DIY Flamingo Party Favor Bag

These DIY Flamingo Favor Bags will add some crafty cuteness to any flamingo party! You can also just make one at a time to use as a thoughtful gift bag for your favorite flamingo fan.
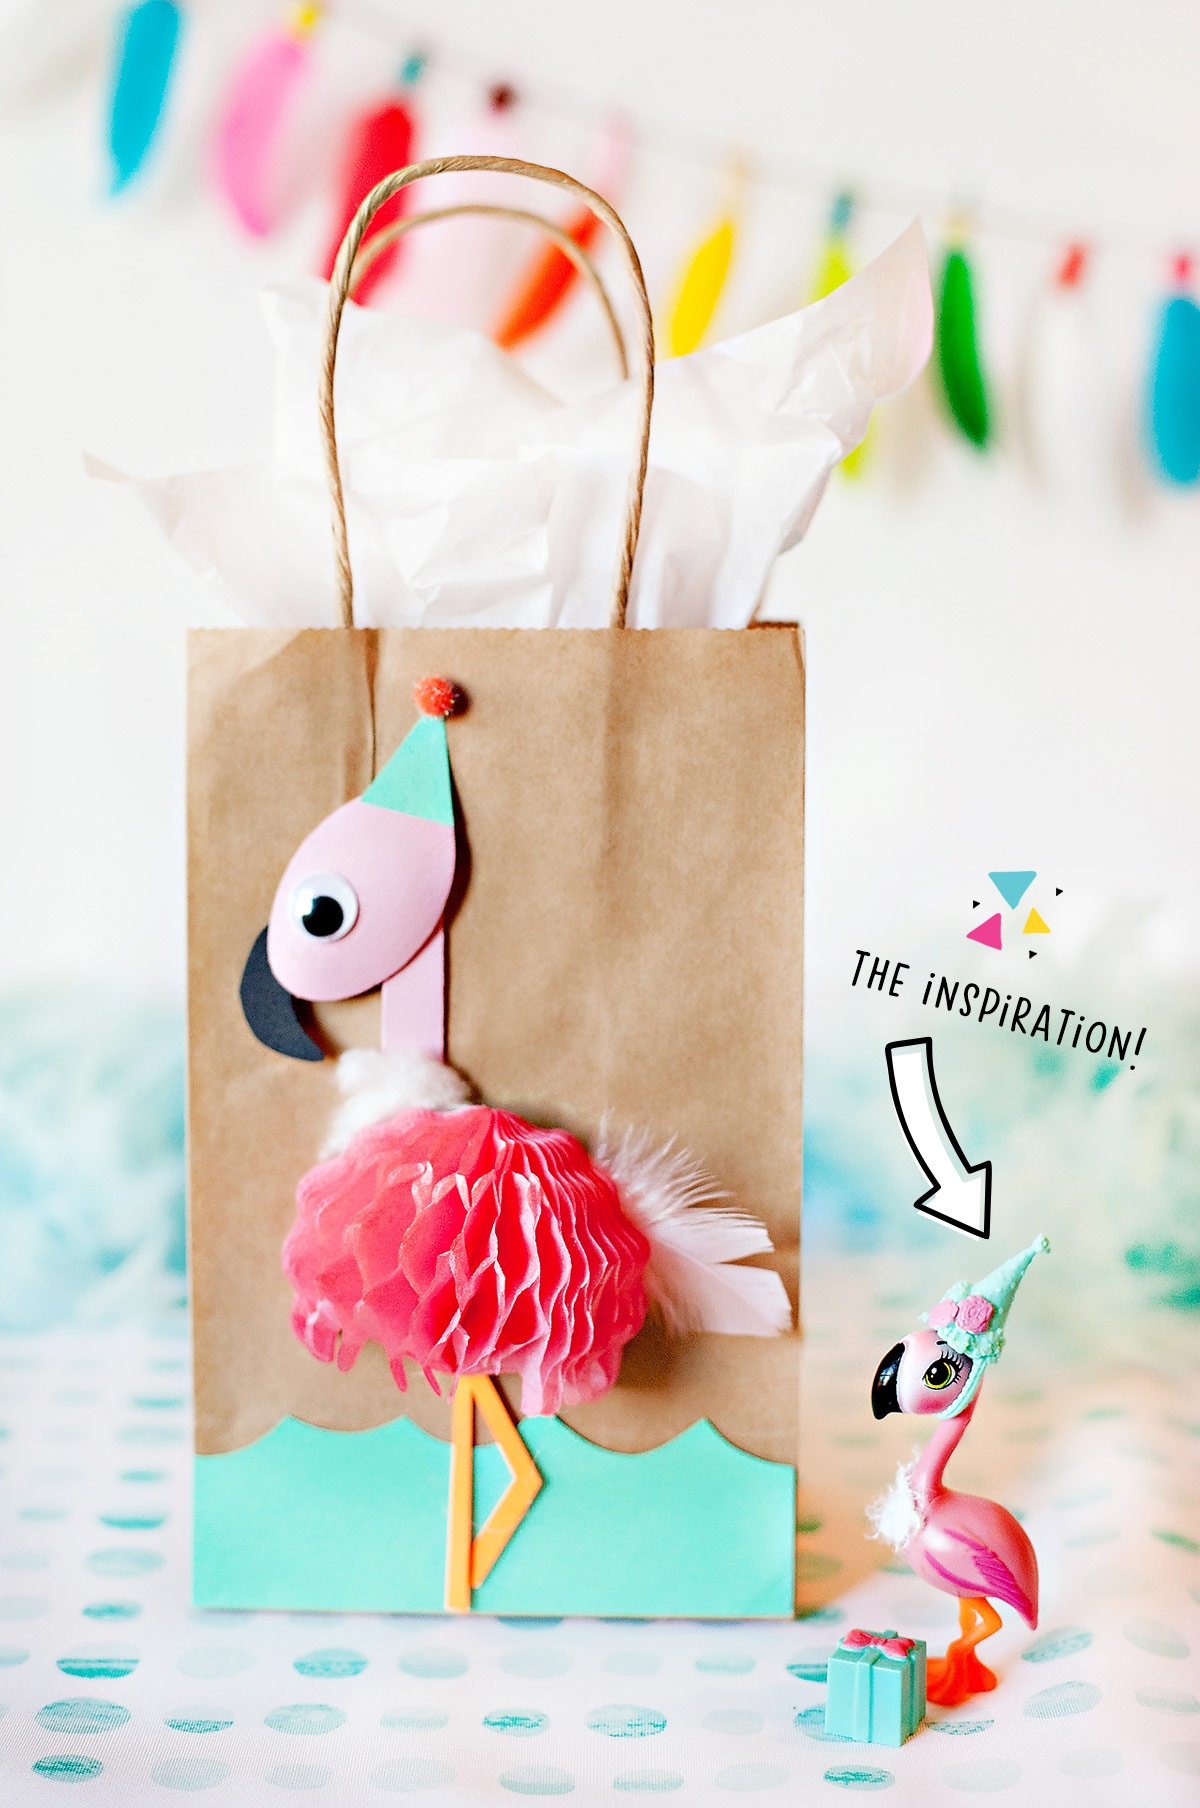
The unique thing about this project is that it utilizes a wooden spoon for the flamingo’s head and neck, and a honeycomb ball for its body. This gives the finished bags a 3D look that’s guaranteed to bring some smiles… and bonus creative points for you! 😉
I originally designed these bags as part of a project for Mattel, so their look is inspired by the darling little flamingo in their Enchantimals toy line (see image below). Here’s how you make ’em…

DIY FLAMINGO PARTY FAVOR BAG
***
Materials:
- Favor Bag – around 8×5″ size (I got this one at Michaels)
- Disposable Wooden Spoon
- Pink Craft Paint
- Paint Brush
- Wiggly Eye
- 3” Honeycomb Ball (like the ones on this pink honeycomb garland from Target)
- Card stock – Mint, Black, Orange
- Mini Craft Pom
- Cotton Ball
- Scissors
- Hot Glue Gun
Steps:
1. Paint the wood spoon pink and let dry completely.
2. Cut a simple paper beak, legs, and hat from your card stock. (I just freehand cut this step, but you can trace it out first if you like or use a cutting machine to make a bunch all at once.)
3. Cut a paper “wave” that’s the same length as your favor bag and glue it to the bottom of the bag.
4. Cut spoon in half, right at the “neck” of the spoon.
5. Attach the spoon pieces together in a new way to form the “head” and “neck” of the flamingo. Turn the top part of the spoon at a diagonal angle, with the cut side towards the top. Then, hot glue it to the handle piece. (See photo for reference.)
6. Glue the paper beak and wiggly eye to the “head”.
7. Glue the flamingo head/neck to the bag.
8. Trim around a 1/2 an inch off the honeycomb ball to make the sphere shape flatter at the bottom. Open the honeycomb ball half way and hot glue it to the paper bag to form the flamingo “body” (rounded side up).
9. Add the feather tail and cotton ball accent (at the top of the body).
10. Glue on the paper legs and party hat. Don’t forget the tiny pom pom on top of the party hat! 😉
P.S. For more flamingo party cuteness, check out my Flamingo Pool Float Dessert Cups and Flamingo Fiesta Girls Night In!


