DIY Tutorial: Metallic + Chevron Fringe Risers

Let’s get fringetastic! Today we have another fabulous DIY tutorial from our Royal Baby Shower that involves metallic tissue paper and chevron pattern, so get excited people! These fun Fringe Risers are crafty, affordable and playful… perfect to showcase your favorite desserts or make your centerpieces pop!
FRINGE RISERS – A DIY TUTORIAL
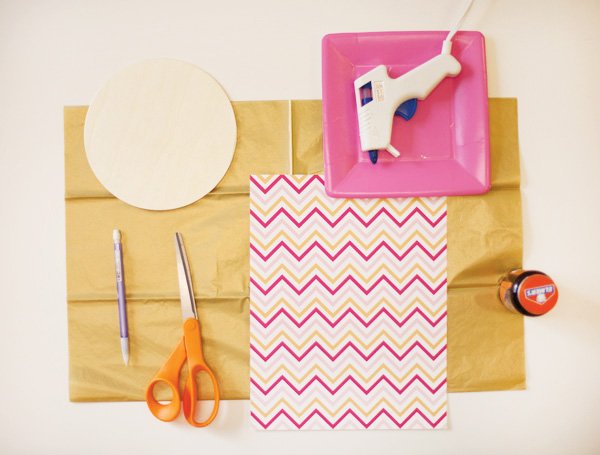
Materials:
- Thin, wooden disc {ours were about 8 inches}
- Tissue paper sheet {20×24}
- Patterned Paper (We used chevron printable pattern from the Royal Baby Shower Collection)
- Candlestick/Pedestal
- Scissors
- Rubber Cement
- Pencil
- Glue Dots
- Hot Glue
Step by Step Instructions:

1. Trace the outline of the wooden disc onto the patterned paper & cut out.

2. Apply a generous coat of rubber cement to the disc & adhere the paper circle on top. While the rubber cement is still wet, you can slide the paper around until you get it in the perfect spot. Once you have it in place, press firmly. Trim along the edges if there is over hanging paper.
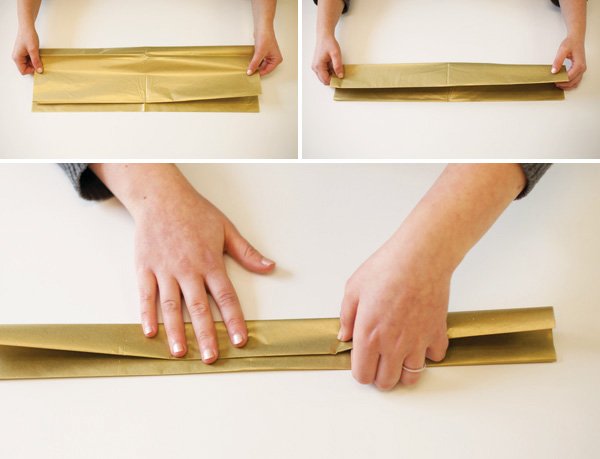
3. Next, lay out the tissue paper horizontally (landscape) and fold in half, short edge to short edge. Continue folding the sheet in half until you get down to about 3 inches.

4. Holding the creased edge, fold over 3/4 of the way to the other edge.
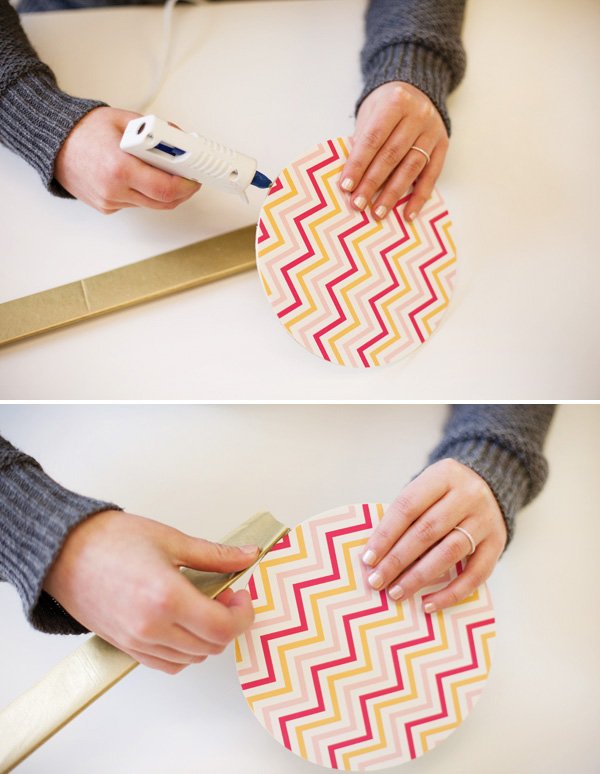
5. Apply hot glue to edge of the wooden disc & attach tissue paper. Continue until you’ve gone all the way around the disc.
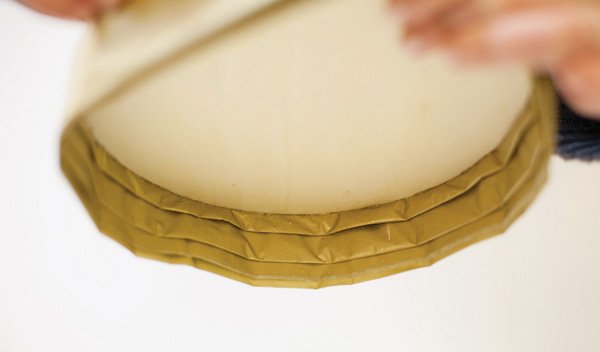
TIP: This is what it should look like on the inside.

6. Once you’ve attached the tissue paper, take your scissors and cut strips (about 1/4 inch) all the way around.

7. Run your fingers through the fringe to fluff & separate.
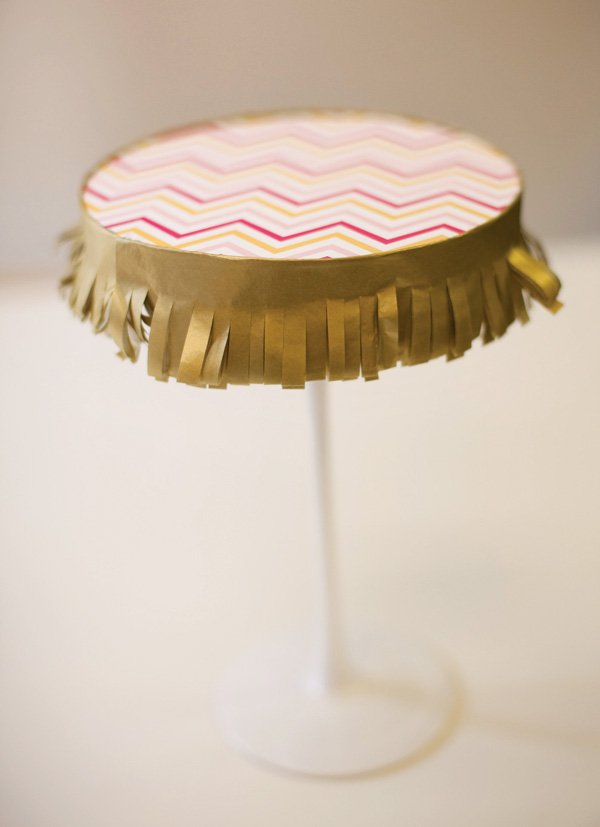
8. Using glue dots attach the completed disc to a pedestal of your choice! {We used a white candlestick holder.}

TIP: For a playful touch, make multiple stands with different paper and trim colors. (At the event, we also used gold glitter paper and pink fringe.)
*****
3 Comments
Comments are closed.


oh thats a really fun craft idea, great for height on dessert tables! love the fringe!
I love this! Simple yet dramatic!