How to Make Teepee Cake Pops – A DIY Tutorial
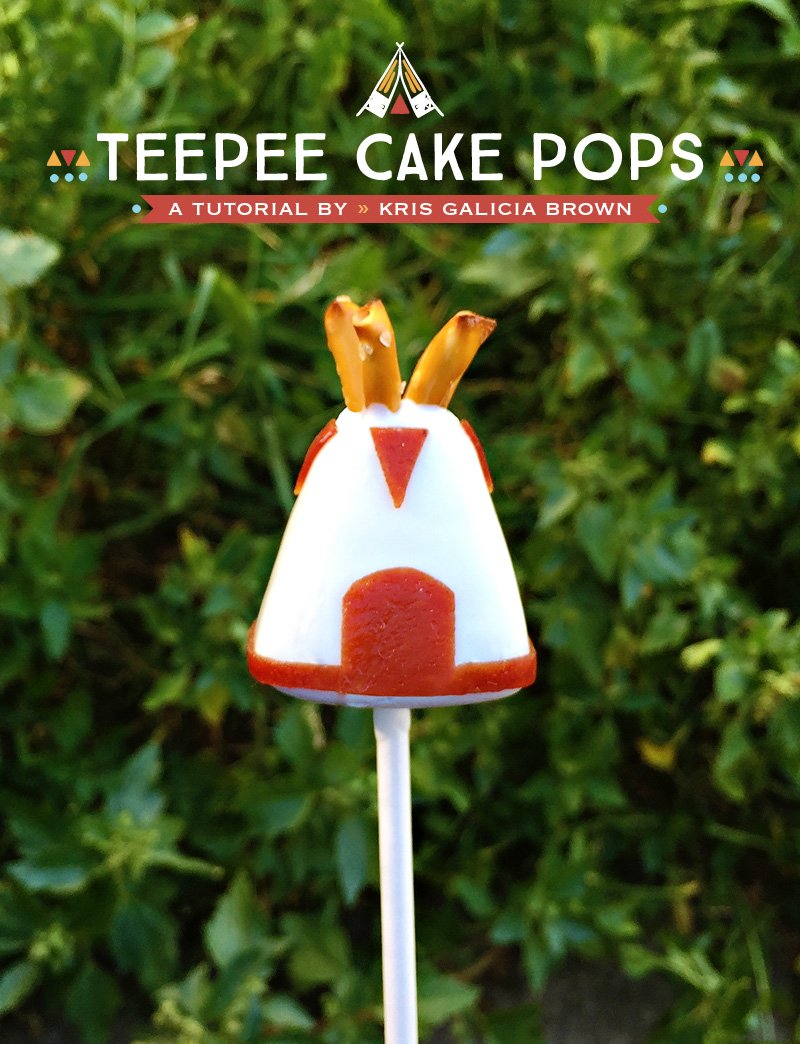
I’m so excited to share this fun (and very DO-ABLE!) cake pop tutorial with you today. I mean seriously, how cute are these little edible teepees, which are cleverly embellished with pieces of fruit leather and pretzel sticks…

This tutorial was created by my friend and fellow San Diegan, Kris Galicia Brown. She’s an expert custom cake pop maker with a keen eye for detail, as demonstrated in her fabulous book, Pop Art: Decorating and Shaping Custom Cake Pops.
Kris also recently launched a new Craftsy eClass: Enjoy Party-Perfect Cake Pops – which is such a great way to get started with making SHAPED cake pops of your own! There’s SO much fun to be had beyond the basic circle. ;)

She really breaks the cake pop making process down in an approachable manner, from teaching you how to make cake pop dough with the perfect consistency to various shaping, dipping, and decorating techniques. Click here to check out the class in more detail and get 25% off!
And now… onto the teepee tutorial!
PARTY DIY: TEEPEE CAKE POP TUTORIAL
by Kris Galicia Brown
Teepee cake pops are the perfect accompaniment to any camping, glamping or boho themed parties. Make and decorate them for the dessert table,hand them out as a party favor, or another fantastic idea is to make them a DIY party activity– a blank canvas for your party guests to decorate as they wish using fruit leather or fruit tape!
You’ll need:
- Cake pop dough ready for shaping
- White candy wafers (or color of choice)
- Mini pretzel sticks, snapped into ½ inch pieces
- Fruit leather or fruit tape in a variety of colors (I’m using Annie’s)
- Paramount crystals
- Lollipop sticks
- Toothpicks
- Scissors
- Wax paper
- Cake pop stand or styrofoam block
Instructions:
STEP 1
Line your work surface with wax paper. Create perfect cake pop dough and learn the proper way to shape by using this tutorial. Use a cookie scoop to portion out the dough and shape one at a time.
Roll into a ball, then roll it into a teardrop.

Next, use your flat work surface to flatten the bottom and square off the sides. Also, flatten the top point just a bit.
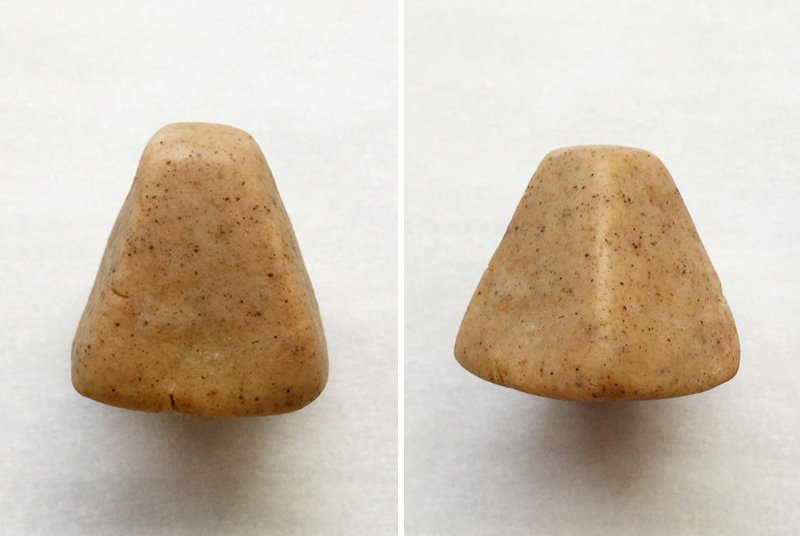
Refrigerate all pieces on a wax paper-lined cookie sheet for at least 10 minutes.
STEP 2
Snap pretzel sticks into ½ inch pieces. Set these aside for now.

STEP 3
Melt white candy coating (or color of choice) in a small microwave-safe plastic bowl or cup.
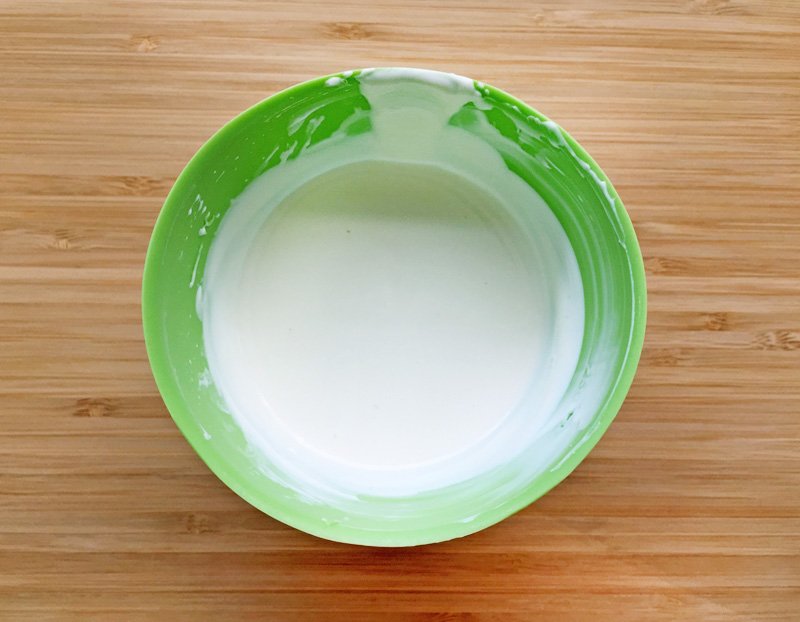
Heat coating for 1 minute at 50% power and give it a stir. Continue to microwave for 30 second bursts at 50% power until melted, making sure to stir between each burst of heating. Thin the coating using paramount crystals. This coating can be reheated if needed later in the process.
STEP 4
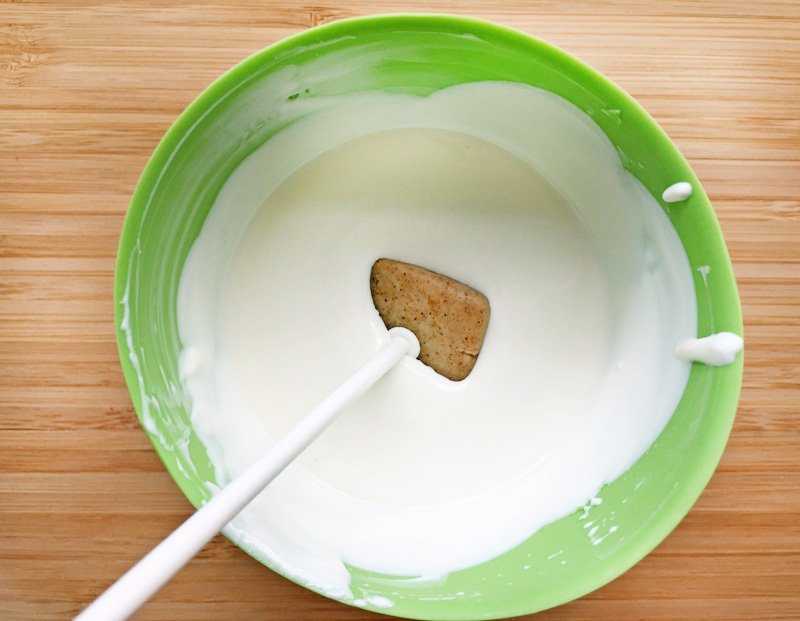
Remove cake pieces from the fridge. Let them stand at room temperature for about five minutes.
Dip about ⅓ inch of a lollipop stick into the candy coating, then push it into the bottom side of a cake pop until it’s about halfway through. Repeat for each cake pop.
Let the sticks set completely. You can place them back in the fridge for a minute or two to speed up the process if you’re working in a hot kitchen or non-temperature controlled environment.
STEP 5
To avoid cracks in your cake pops, the white coating should be around body temperature and not any hotter. Check by dipping a knuckle into the coating. It shouldn’t feel hot to the touch.
Dip each cake pop into the white coating, submerging it completely and pulling it straight out. Shake the excess off and carefully pierce any air bubbles you notice with a toothpick.
STEP 6
While the coating is still wet, add 4 pretzel pieces to the top, facing each one outward. Let dry completely on a cake pop stand or on a styrofoam block.

STEP 7
Next, cut the fruit leather or fruit tape to create different designs/shapes, or you can serve the cake pop with a roll of fruit tape for your guests to decorate their own teepees!
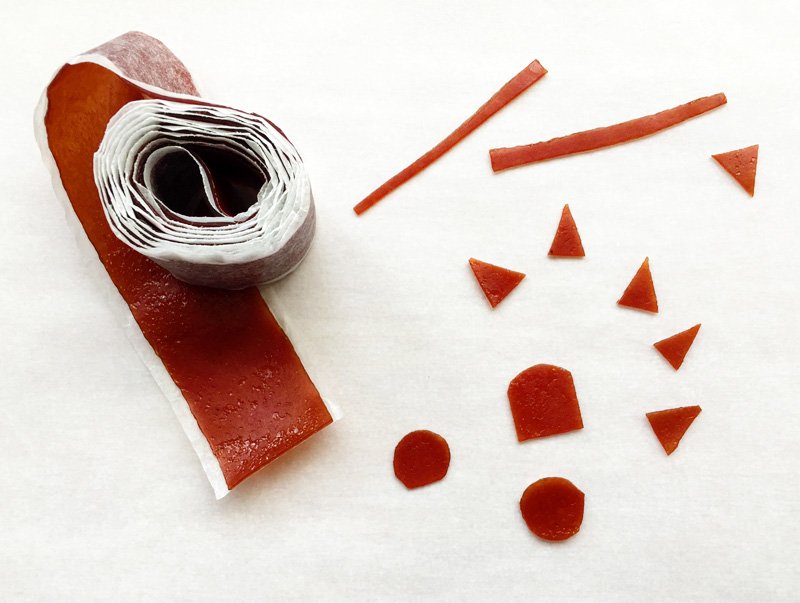
Use scissors or a pizza cutter to cut doors, triangle shapes, stripes, or anything you wish! If using scissors, I find it easier to cut while the paper is still on the fruit tape. Just remember to remove the paper backing before adhering to the cake pops!

Depending on the type of fruit leather or fruit tape you buy, you can adhere the pieces a few different ways.
The thinner they are, like Annie’s fruit tape or Fruit by The Foot, simply brush a little bit of water onto the cake pop and the pieces will stick very easily.
Thicker fruit leather will require a dab of candy coating. Use a toothpick, to “glue” the pieces onto the cake pop.
Enjoy!

Thanks again to Kris, for sharing this fun tutorial with us! You can also follow her work on Facebook, Craftsy, Instagram and YouTube.
8 Comments
Comments are closed.


How to Make Teepee Cake Pops – A DIY Tutorial #catering #wedding https://t.co/HDu2CzHWss
How to Make Teepee Cake Pops – A DIY Tutorial https://t.co/96IGoS9Qcd
How to Make Teepee Cake Pops – A DIY Tutorial: Hostess with the Mostess®
I’m so excited to share this fun (and… https://t.co/9BCdQtIfr3
How to Make Teepee Cake Pops – A DIY Tutorial https://t.co/npvLwprijq
My daughter has birthday this weekend. I will make surprise for her :)
How to Make Teepee Cake Pops – A DIY Tutorial https://t.co/5YpxVdVkP0 https://t.co/BeKzU4M4UL
hey do u eat the dough raw??
Hi Stacie – Cake pop dough is actually made from cooked & crumbled cake + frosting, so nothing is raw even though the texture makes it appear like a “raw” looking dough. :) Check out this link for more info. Hope that helps!