Creative Mickey Mouse 1st Birthday Party Ideas {+ Free Printables}
Turning ONE is so much fun… but especially so when Mickey & the gang are involved! I was thrilled when Disney Baby asked me to come up with some creative DIY party ideas that complimented the Mickey Mouse 1st Birthday Party Collection from Party City, which features adorable illustrations of BABY Mickey & friends. If you’re looking to throw a Mickey themed first birthday for your little girl or guy, you’re in the right place! ;)
Inspired by the color palette of the collection + Baby Mickey’s cute blue and yellow overalls, I set out to create a Mickey Mouse 1st Birthday Celebration filled with stylish, playful and very approachable ideas… and with a look that could be appreciated by little ones and grown-ups alike. Let’s face it – the first birthday party is as much a milestone celebration for mom and dad as it is for the pint-sized guest of honor!
Scroll down to take a closer look + find detailed how-to info and shopping resources on all of the individual ideas… from Baby Mickey inspired table settings and centerpieces to simple drinks and homemade desserts. P.S. Don’t miss the links to download all the FREE PRINTABLES from this theme at the bottom of the post too. Enjoy!
WHAT YOU’LL FIND HERE:
- General Look & Feel (intro images)
- Tablescape
- Drink Station
- Dessert Station
- Smash Cake


• • • • • T H E T A B L E S C A P E • • • • •

This kid-friendly tablescape was so much fun to put together! Each place setting featured the Mickey 1st Birthday Paper Lunch Plates and Party Hats that I embellished with yellow tissue fringe. Yellow buttons were hot glued to wooden forks for another sweet touch.
Inspired by Mickey’s outfit in the design on the paper plates, I used strips of light blue felt + big yellow buttons to give the wooden folding chairs a “Mickey overalls” look. The same idea was incorporated into the DIY Mickey table centerpiece too, which featured a Mickey ears silhouette displayed in a gold-painted mason jar that was also dressed up with felt overalls. You can make the Mickey ears silhouette by hot gluing 3 small embroidery hoops (available at craft and fabric stores) together and spray painting them black.
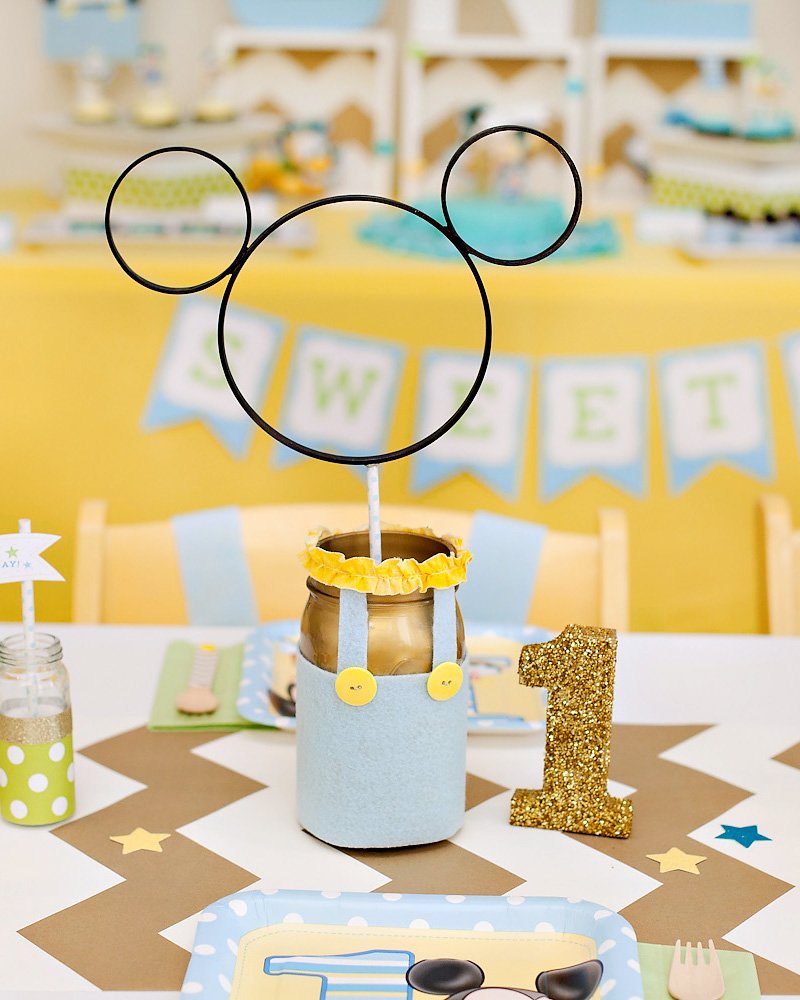
On either side of the centerpiece were small, playful jars holding themed mini banners that read “SMILE from Ear to Ear” and Happy FIRST Birthday”. You can download these banners with the rest of the free printables below! Just cut them out and and hot glue them to decorative straws.
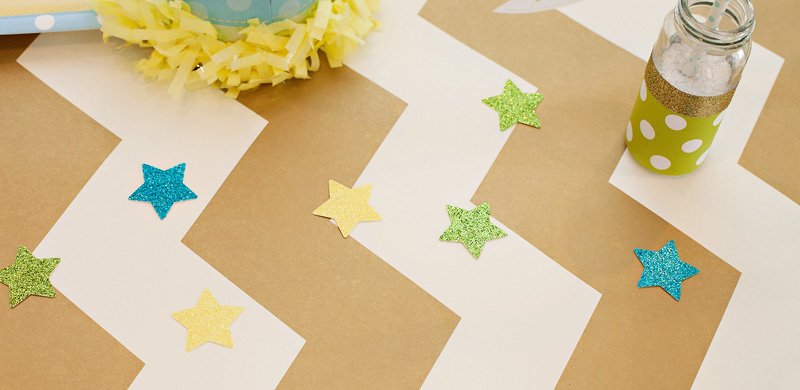
Small pops of glitter and gold can go a long way in making an occasion feel extra festive… just like a first birthday should be! To add some festive touches to the table, I glittered a wooden 1 (purchased here), added glitter tape to the jars, and punched star shaped confetti from glittered paper to scatter across the table.
• • • • • T H E D R I N K S T A T I O N • • • • •
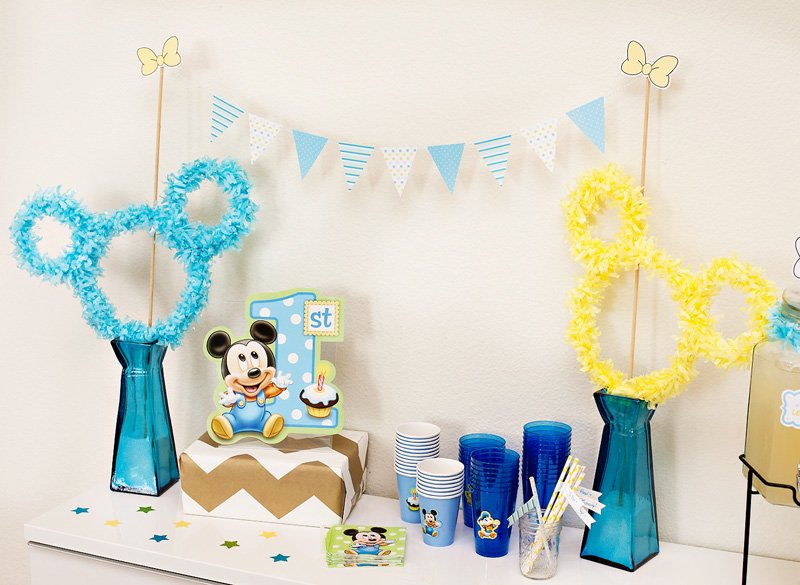
The drink station was simple and fun! I made 2 more of the Embroidery Hoop Mickey Silhouettes to decorate this area, but covered them with tissue fringe this time for a very playful, festive vibe. Printable patterned paper was used to make the triangle garland that hung across the top of the table, between 2 wooden dowel rods. This added some nice height to the overall display.
As far as drinks for the little ones, there’s no need to get complicated! Just give tried-and-true beverages fun names like “ONE-derful Water” and “Oh Boy! Fresh Squeezed Lemonade”. (Download the labels for these below.) You drinks will also look super cute served in beverage dispensers embellished with decorative paper details and tissue fringe.

Straws are another fun way to quickly dress up your drinks! (Grab the free printable for these straw party flags below as well.)

Last but not least are the cups themselves! I created this super quick & easy “semi DIY” cup by hot gluing some of the Baby Mickey Table Confetti from the Mickey 1st Birthday Decorating Kit to the cups:

• • • • • T H E D E S S E R T S T A T I O N • • • • •

Instead of ordering one giant (or extra expensive) cake for kids birthday parties, I like to set up a table full smaller, themed treats that guests can enjoy throughout the party. The other added bonus to setting up a dessert station is that it easily doubles as great “decor” for your party, and almost always turns into the focal point of the room!
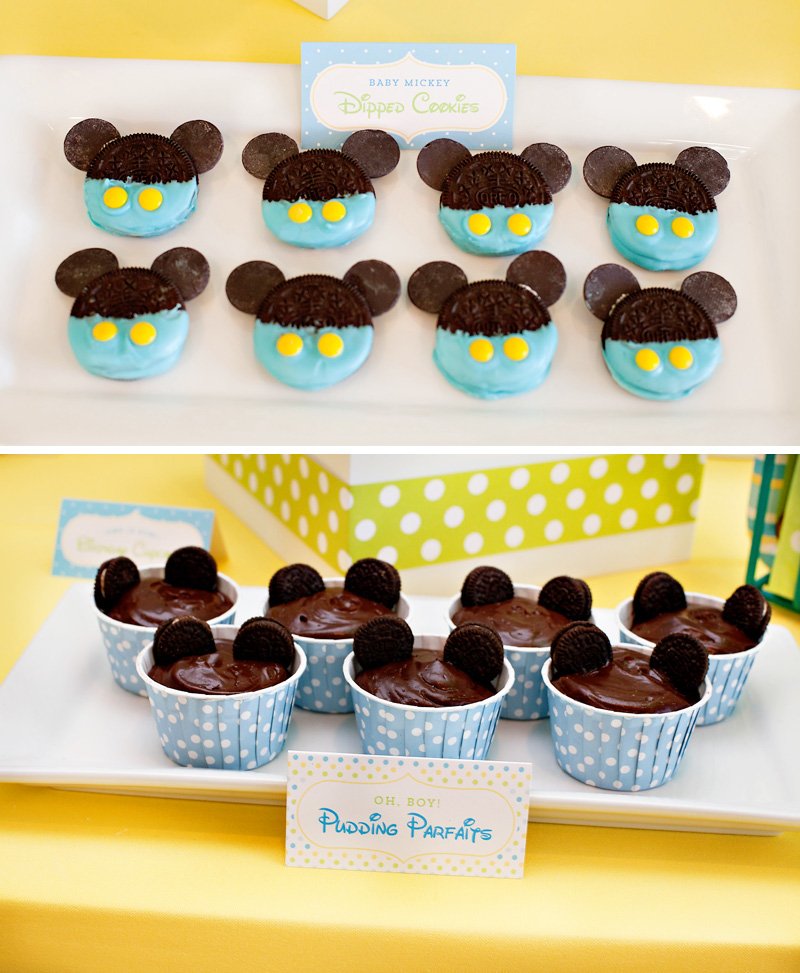
This particular dessert table is full of homemade and very inexpensive (hooray!) treat ideas like cupcakes with DIY toppers (made from more of the themed Table Confetti), Baby Mickey Dipped Cookies and Oh, Boy! Pudding Parfaits:


These Mickey Mouse Sour Lollipops are another fun idea for a themed treat that could easily double as a take-home party favor for guests:

To make these Mickey “lollipops”, I rolled Sour Gummy Belts (in Berry Blue and Green Apple flavors) into tight circles and secured them with toothpicks and bamboo skewers.
To make the display boxes for the pops, I spray painted 5″ wooden boxes black, then added felt and buttons to create the Mickey overalls look again. The inside of the container is filled with floral foam that’s covered up with a layer of black sugar sprinkles.
Now let’s talk about the 2 elements that are super important to the look of the dessert table, even though they aren’t edible: the backdrop and the supplemental decor…

The focal point of this dessert table backdrop is another Mickey Embroidery Hoop Silhouette… by far the largest one of them all! Repeating the same type of ideas in different sizes & styles throughout the party is a fantastic way to keep the look of the overall party coordinating and tied together. For this Mickey silhouette – which was centered between the two 36″ polka dot balloons on either side of the table– I added a DIY “birthday hat” topper made from patterned paper + gold glitter tape with a little tissue fringe “pom”. Again, these are all decorative elements that were used elsewhere in the party. :)
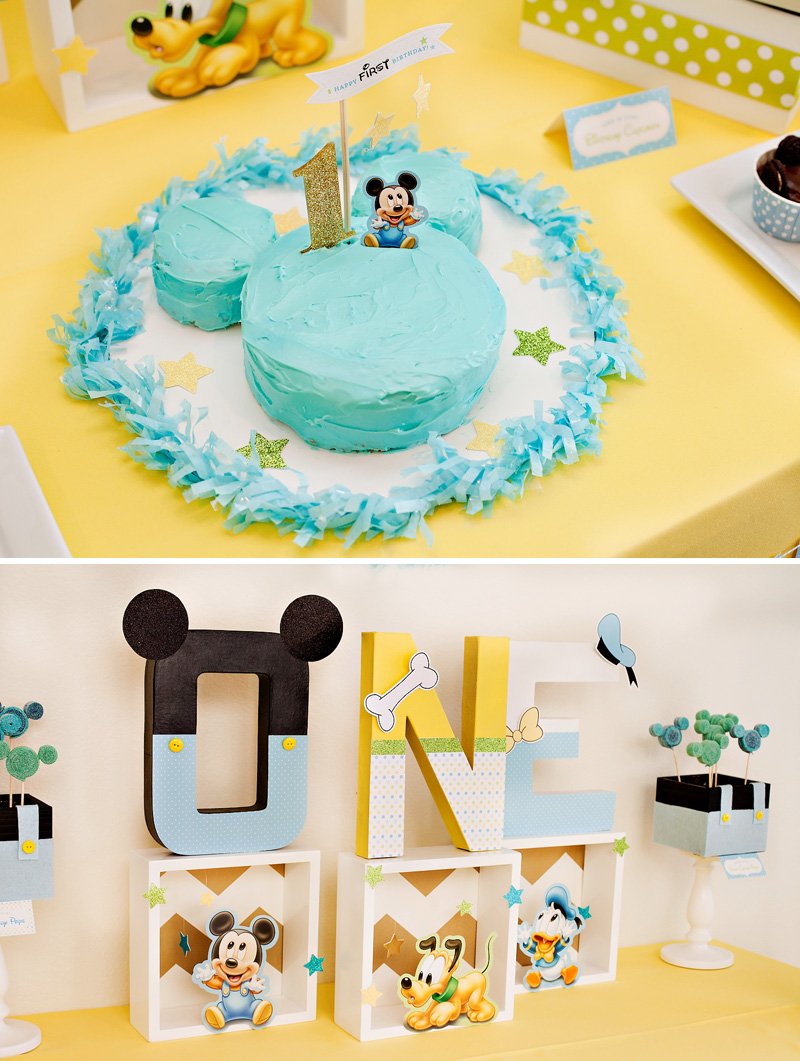
For the centerpiece ON the table, I used 12″ tall paper mache letters that spelled ONE. (You could also feature the birthday boy’s name or initials to further personalize the design.) These letters were spray painted & embellished with a mix of patterned and glittered paper + buttons. I lined the back of 10″ white wall cubes with gold chevron paper and used them as “risers” for the letters. To really play up the theme, I also added a few of the Mickey 1st Birthday Character Cut-Outs to the front of the wall cubes, and hung star confetti on fishing wire above them so that it would look like the characters were reaching up for the stars. ;)
• • • • • T H E S M A S H C A K E • • • • •
Last but not least, we can’t forget the all-important! Smash cakes are such a fun tradition at birthday parties, and – lucky for us – the simplicity of the famous Mickey silhouette makes it super easy to create a themed smash cake at home.
To make this one, I used a small 6″ cake pan + 2 standard ramekins for the ears:
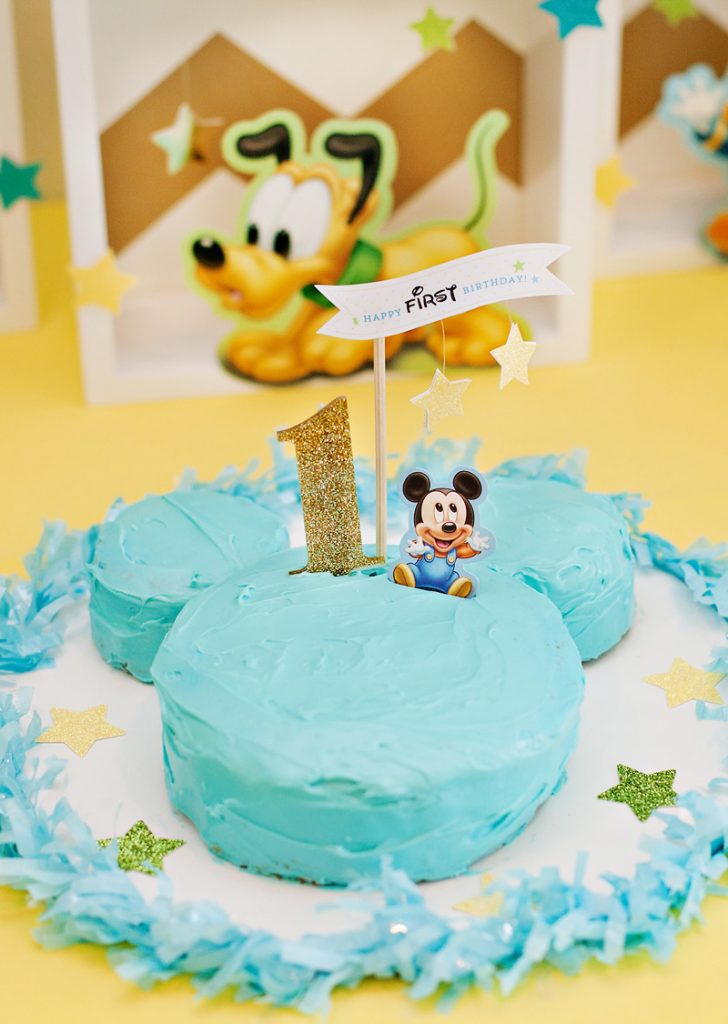
Once your cake pieces are baked and cooled, I’d recommend frosting the pieces separately first, and then placing them together into the Mickey form on a cardboard cake board (as shown here). I embellished this cake board with a tissue fringe rim (adhered with hot glue) + more of the sparkly star confetti. The DIY portion of the cake topper is made from a printable mini banner, more star confetti, and a piece of character confetti (from the Mickey 1st Birthday Decorating Kit).
I also ordered an acrylic glittered “1” cake topper that tied in quite well to the DIY version of a glittered 1 on the table!
• • • • • F R E E P R I N T A B L E S • • • • •
Click on the following links to download the party printables featured in this post:
- SWEETS Banner
- Party Flags (2 styles)
- Patterned Paper (3 styles)
- Scalloped Labels (blank)
- Tent Cards (pre-filled with drinks & desserts)
- Tent Cards (blank)
- Mini Banner Silhouettes (2 styles)
Disclosure: This is a Sponsored Post. As always, all thoughts, opinions, and designs are my own. Thank you so much for supporting the sponsors that make it possible for us to keep the creative HWTM content coming to you!
31 Comments
Comments are closed.


Creative Mickey Mouse 1st Birthday Party Ideas {+ Free Party Printables} #catering #wedding http://t.co/KV65kYHTWK
Creative Mickey Mouse 1st Birthday Party Ideas {+ Free Party Printables} http://t.co/fXdeegrv1D
Creative Mickey Mouse 1st Birthday Party Ideas {+ Free Party Printables} http://t.co/a37O71chYp
LOVE!! This is oh so cute, Jenn!!!!!
Creative Mickey Mouse 1st Birthday Party Ideas {+ Free Party Printables} https://www.hwtm.com/2015/06/mickey-mouse-first-birthday-party/ #partyideas #feedly
THANK YOU SO MUCH FOR THE FREE PRINTABLES! CAN YOU REPOST THE MINI BANNER SILLHOUETTE PRINTABLE? I THINK IT WAS ENTERED WRONG. THANK YOU
Just updated the link – sorry about that! You can also click here to download if that’s easier. :)
Wonder if you printed on a normal paper or any hard paper for the tentcards
Hi Sam –
Using something sturdier than normal paper is definitely ideal. :) I used this 45 lb matte photo paper for the tent cards – it feels somewhere between regular paper and cardstock. I also often use the Staples brand 65 lb matte paper for tent cards too though, which is a little thicker than the Canon.
I love this! I have a question though, how did you create the tissue fringe? Did you cut tissue paper? That seems like a lot of cutting, so I wasn’t sure. Thanks!
Hi Magan – No cutting! I just purchased the tissue fringe that way. :) You can find it on Amazon or here. Hope that helps!
Did you make that Mickey hoop silhouette? If not where did you purchase?
Those are wonderful ideas! One question the Oreo dipped cookies, what did u use for ears and the buttons?
Thank you
Kelli
Thanks, Kelli! For the cookies, the ears were Chocolate Candy Melts (by Wilton), and the “buttons” are mini M&Ms (I just picked the yellow ones out of the mix.) Hope that helps! :)
Where can I find the table runner?
Hi Anca – The table runner is actually a roll of chevron gift wrap from Paper Source! I’m not sure if they still sell that exact design, but you could really use a nice chevron gift wrap from another retailer as well. :) Good luck!
Thanks for all the great ideas! Wondering if you have a link for a print out of the Donald hat, bone, and bow? Thanks
Hi Stephanie – Here you go! Enjoy. :)
Kinda late to the party, but would you still have the files for the Party Flags, and would you be able to upload without font, so I can put other words on it?
love the décor! how did you make the mickey silhouette that is in the jar?
Thank you! For the Mickey silhouette in the jar, I hot glued 3 small wood embroidery hoops together then painted them black. I hot glued a wooden dowel rod to the bottom of the “face” and slid a paper straw over the dowel to “pretty it up”. :) I used blue felt for the outfit on the jar and glued the buttons on top. Hope that helps!
Love all these wonderful ideas! My son’s first birthday is next month and this is the theme! Where did you get those hoops to make the fringe Mickey head silhouettes?! Thanks!
Hi Sarah –
I bought the embroidery hoops at Michaels – but you can also find them at JoAnn or online at Amazon. Good luck with your son’s 1st birthday!! :)
Thanks so much!!!
Hi, I was wondering if you could clarify on what a ‘standard’ size ramekin is exactly? Did you use the 3 oz? 4 oz?
Hi Amanda –
The ramekins were actually 8 oz and around 4″ in diameter. Hope that helps! :)
How do you make the tissue fringe Mickey silloutte? Super cute. Thanks in advance.
Hi Kate – So sorry I missed your message before! To make the tissue fringe silhouettes, hot glue 3 wooden embroidery hoops together into a “Mickey Ears” shape (2 smaller hoops for the ears + a larger one for the face), then wrap the entire silhouette with tissue fringe (sometimes also called “festooning tissue”) and secure the fringe with hot glue. You’ll probably need to add the tissue fringe in a few separate pieces, but it looks seamless once it’s all glued together because of the “fluffy” texture of the fringe. Hope that helps! :)