Rainbow Balloon Tassel Tutorial + Festive Party Chair
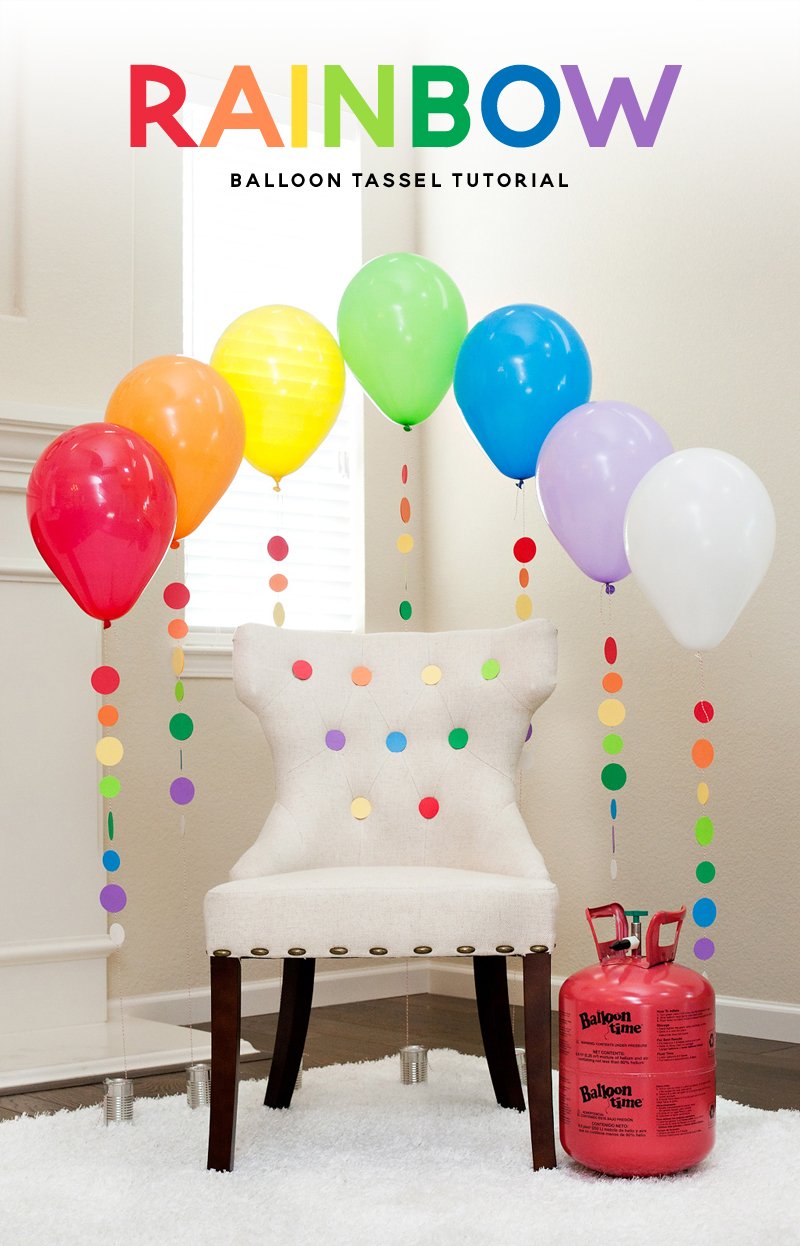
Sometimes the simplest projects can have the biggest impact, and that’s exactly how I feel about this one!
Watch the video below (or scroll down for the pictorial) to learn how paper circles + balloons can create awesome party decor AND transform any ol’ chair into a festive spot for photo-taking and gift-opening!
These Rainbow Balloon Tassels are super versatile and can be used for so many different occasions – from rainbow birthday parties for “kids” of all ages to baby showers, bridal showers, and even colorful graduation pics. Happy party crafting! ;)


RAINBOW BALLOON TASSELS

Materials:
- 12” Balloons in rainbow colors
- Balloon Time Helium Tank
- Card Stock in rainbow colors
- 2” Circle Punch
- 1.5” Circle Punch
- Tape
- Scissors
- Hot Glue
- String
Instructions:
1. Punch paper circles from card stock. (I used 1.5” and 2” craft punches and alternated between sizes.) For each tassel, you’ll need 2 paper circles of the same size per color that you want to use.
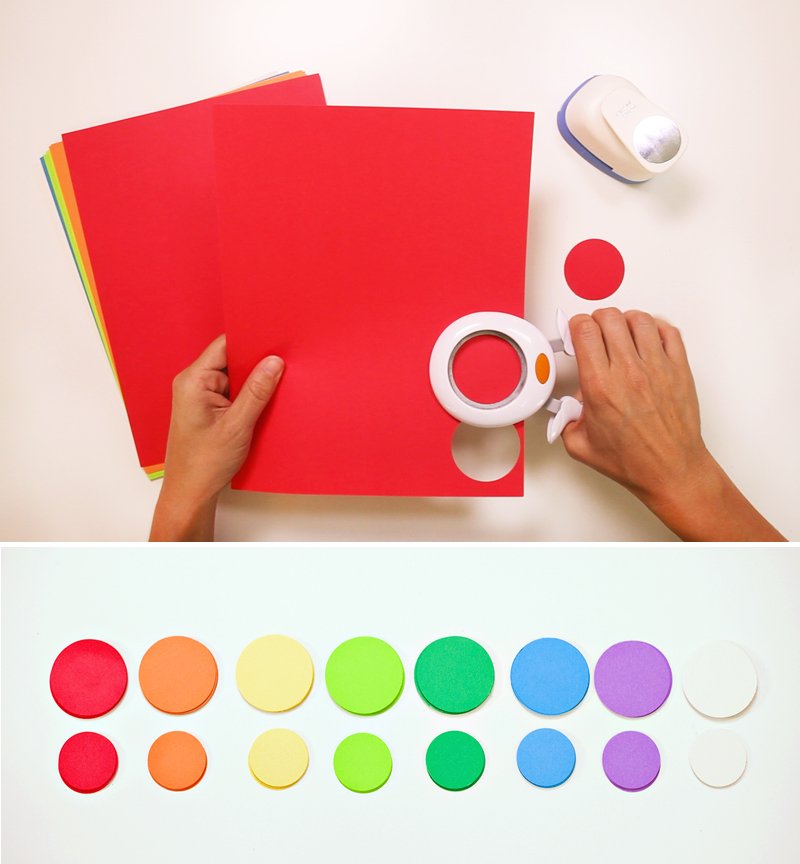
2. Stack the circles into color piles and line them up into 2 “rainbow rows” by size.
3. Begin laying out circles for the first rainbow tassel. Alternate between big and small circles for each color.
4. Place the balloon string on top of the circles, leaving enough excess string above the top red circle to tie onto a balloon later. Tape the string down over the circles and onto your work surface to prevent the string and circles from moving as you work. Adjust the placement of the circles under the string to your liking before you start to glue.

5. Use a hot glue gun to attach a 2nd layer of paper circles on top of the first, “sandwiching” the string in between the 2 layers.
6. Let the glue dry for a minute, then remove the tape and cut the string to desired length. Repeat this process to make as many tassels as you’d like.

7. Use your Balloon Time Helium Tank to fill up balloons in assorted rainbow colors. Tie a rainbow tassel onto each balloon.
8. Tape the strings onto to small balloon weights (such as the mini tin cans shown here), then arrange them in rainbow order around the guest of honor’s chair!
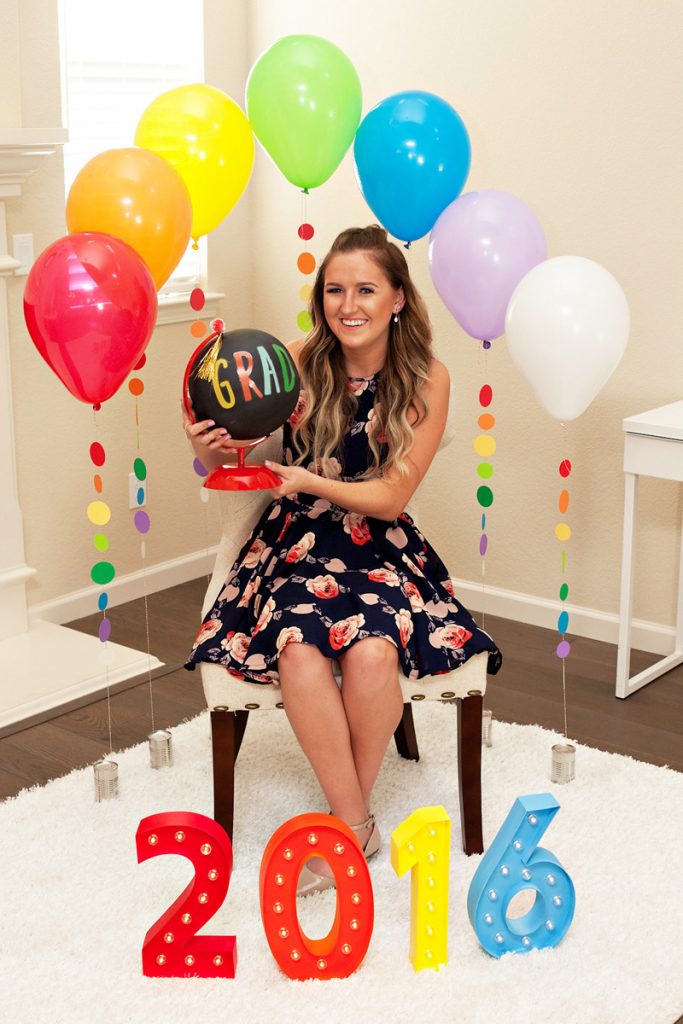
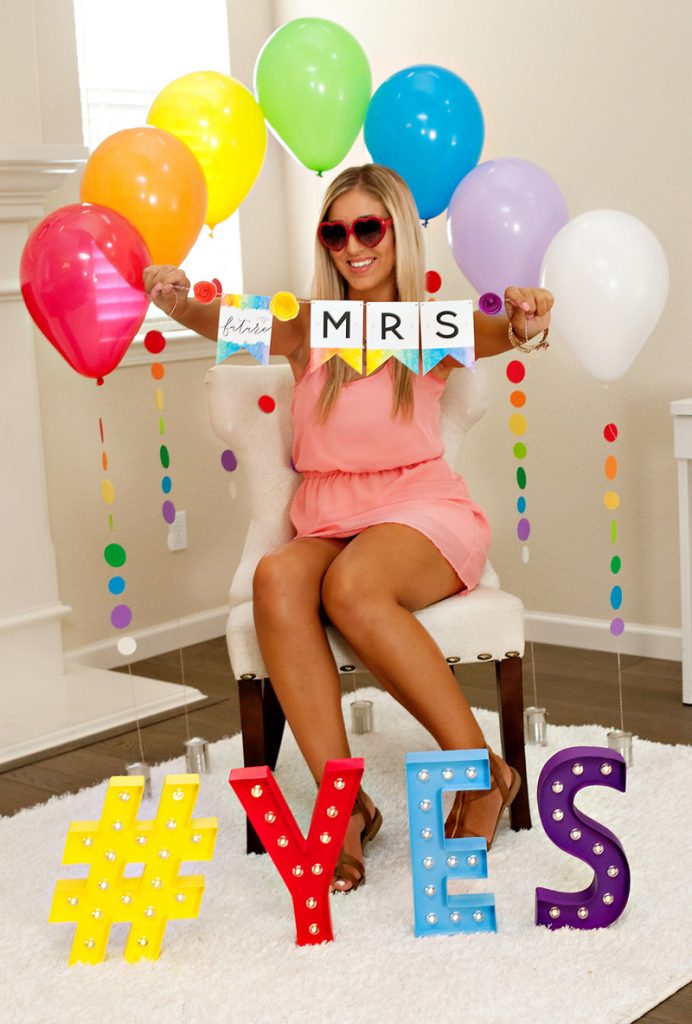
Here are some examples of this rainbow party chair in use! Big THANKS to my kiddos, my cousin Erin, and to Kelsey and Taylor for helping out with this part. :)


Disclosure: This post is sponsored by Balloon Time. As always, all thoughts and designs are my own. Thank you so much for supporting the companies that make it possible for me to keep the creative content coming your way!
7 Comments
Comments are closed.


Rainbow Balloon Tassel Tutorial + Festive Party Chair: Hostess with the Mostess®
Sometimes the simplest proj… https://t.co/Xk69aTsLpf
#ArcoIris con globos – Me encanto esta idea de @HWTM_Jenn la pueden ver en su blog https://t.co/wlfexsPjsK #DIY https://t.co/j8jXJ7LqOh
Rainbow Balloon Tassel Tutorial + Festive Party Chair https://t.co/TGbIG3gaO1
Perfect for a LGBT wedding shower, @HWTM_Jenn creates a ravishing rainbow. LBD wine will get the party started. https://t.co/3O0B4l90gx
This is just so cool! The colors combined with the balloons make for the perfect art therapy project. I can’t wait to try making this with some of my younger clients.
San Jose Counseling and Psychotherapy,
Dr. Randi Fredricks
http://drrandifredricks.com
SO cute! I am curious about that static from hair. I want to do this for a baby shower when mom is opening presents but I don’t want her to hair to be sticking to all of the balloons! How far away from the chair/hair did you go? Did anyone’s hair stick up?
Hi Annabelle – We actually never ran into a static issue at all. :) The balloons were maybe 1 foot from the back of the chair. In looking at the pictures, I can see that in some cases it looks like they’re almost touching the person sitting in thechair, but this definitely wasn’t the case in person… I think that’s just how the camera captured it. You could always allow a little extra space between the balloons and chair too just in case. Good luck!