DIY Tutorial: Cupcake Liner Garland
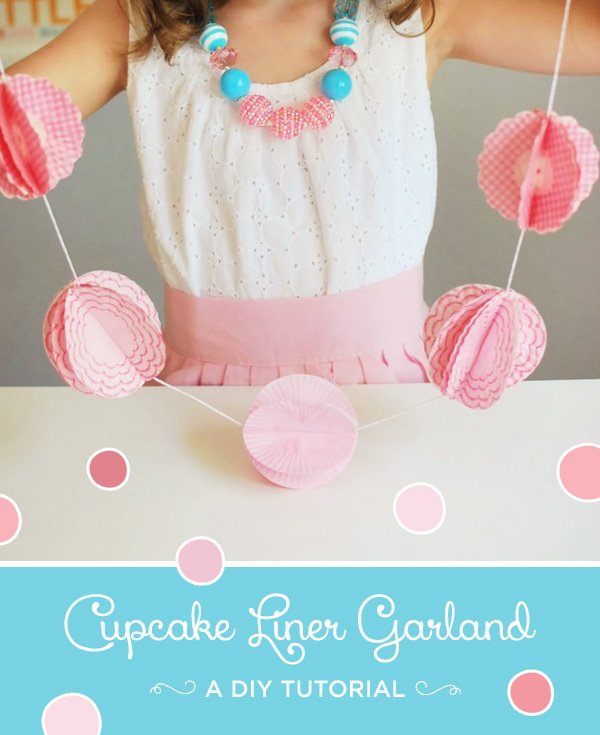
Stefanie Richter of anna and blue paperie, here sharing my latest tutorial! When it came time to creating a backdrop for our Pink and Aqua Cupcake Themed Birthday Party, I wanted something that was simple and one that would compliment the rest of the party’s decor without being overbearing. I decided to create a Pom Pom Cupcake Liner Garland using cupcake liners I already had on hand.
Cupcake liner pom-pom garlands are easy to create and an inexpensive way to add a beautiful touch to your party decor. They are perfect for decorating dessert tables, birthday parties, cocktail parties and wedding receptions. Read on for step-by-step instructions on how to make one yourself!
POM POM CUPCAKE LINER GARLAND – A DIY TUTORIAL
by: Stefanie Richter of anna and blue paperie
Supplies:
- Tray
- Cupcake Liners (10 per pom pom)
- Twine or String
- Scissors
- Glue Stick
- Clear Tape
Step by Step Instructions:
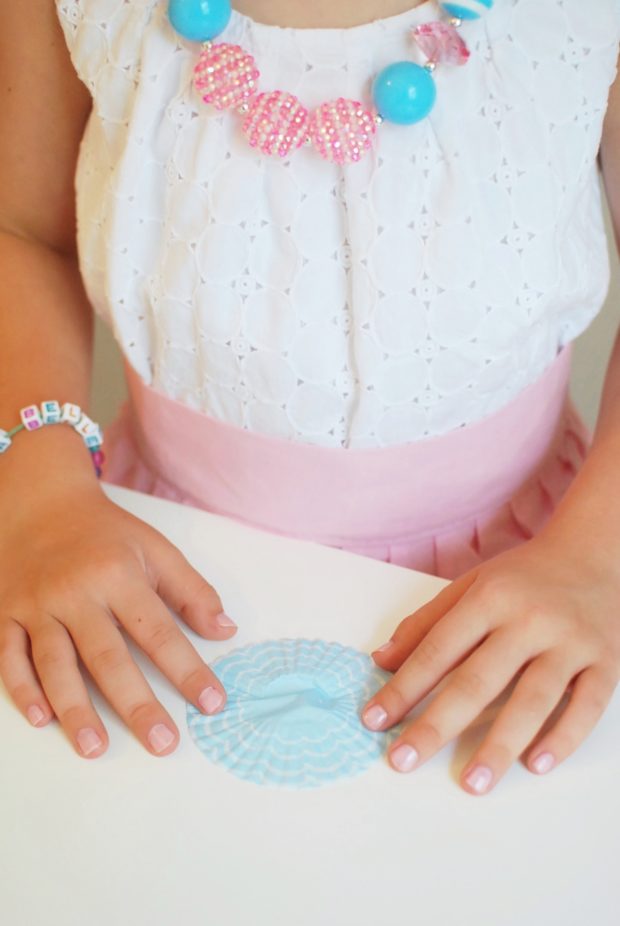
1. Each pom-pom will require 10 identical liners. For each liner, flatten into a circle.

2. Fold your liner in half, inside out. If you liners have scalloped edges, you will need to fold and align them along the same axis for each liner.
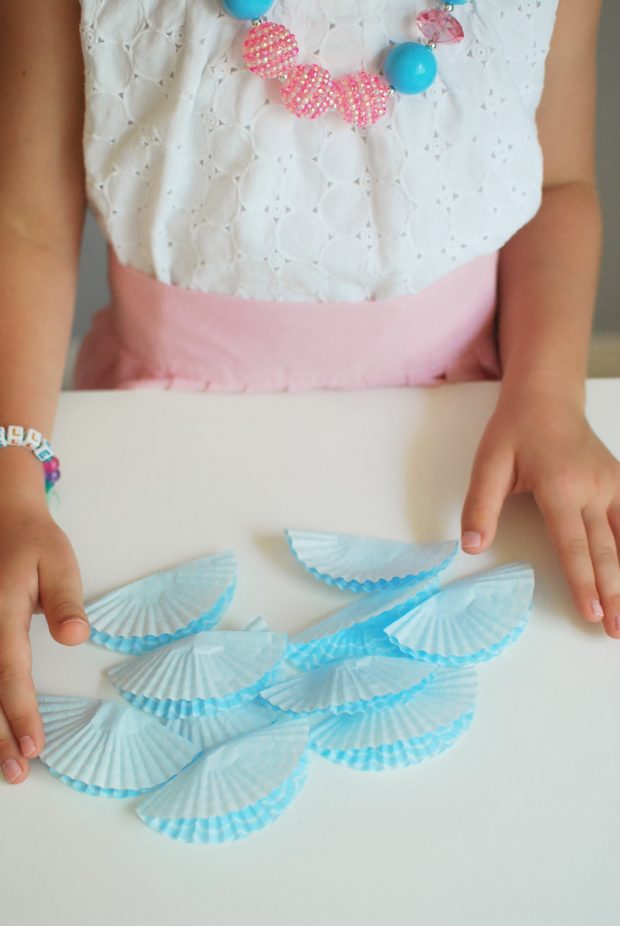
3. Repeat for all of your liners.
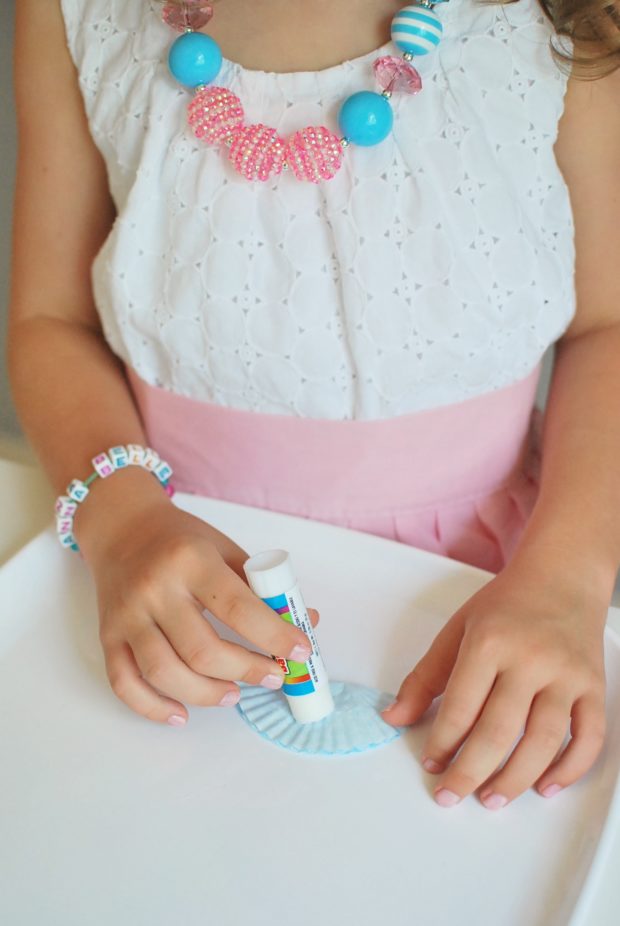
4. Using your glue stick, add glue over half of one liner.

5. Press your second liner onto the glue side of the first liner and smooth with your finger.

6. Continue gluing and adding the rest of your liners, smoothing each one with your finger to ensure the liners adhere nicely.
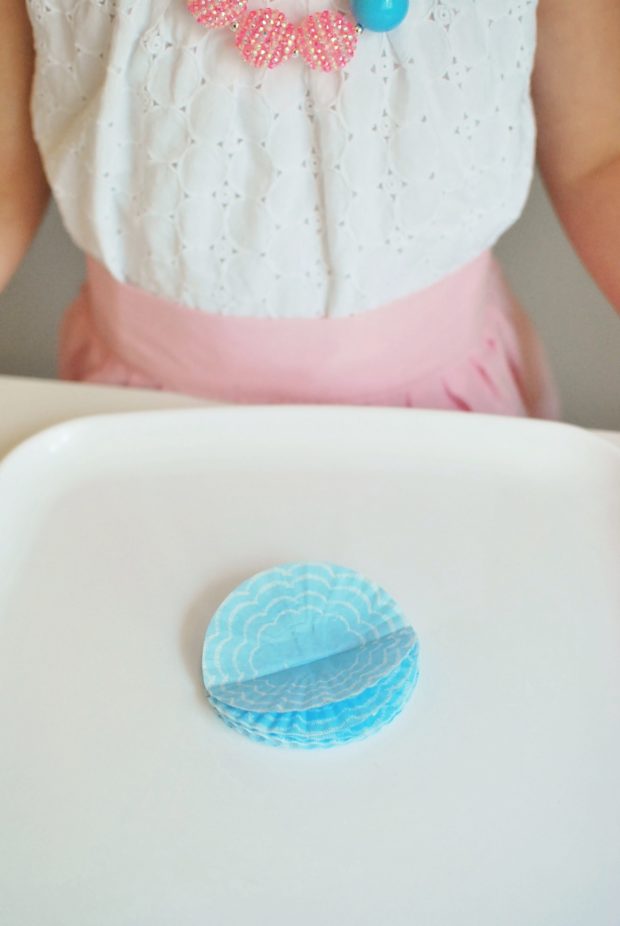
7. After you have added your 10th liner, lay the pom flat to dry. Repeat steps 1-7 to create the desired number of poms.

8. Once dry, open your pom to the section that was not glued. Place twine or string along the center crease of the pom. Leave desired amount of twine or string on each end of garland for hanging.

9. Place two pieces of tape on each end of the pom to keep the string in place.

10. Using your glue stick, add glue over half of one liner.

11. Press the two halves of the open segment together. Smooth together with your fingers and let dry.
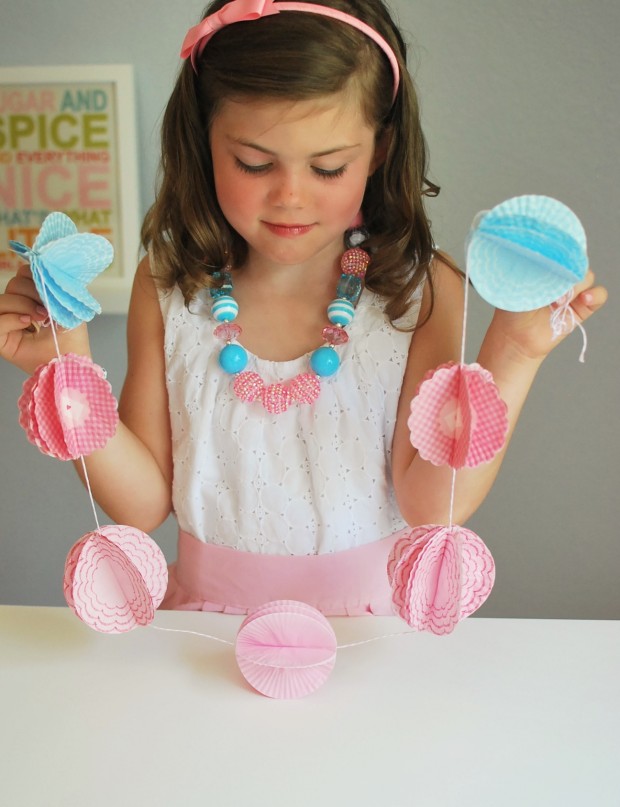
12. Repeat steps 8-11 to complete your cupcake liner garland.

- Bubblegum Necklace: Queeny Belle Frills
- Twine: InTheClear
9 Comments
Comments are closed.


DIY Tutorial: Cupcake Liner Garland http://t.co/qxIApWI5FT #weddings
Very cute and easy to make! Can be a fun activity for the girls at a party? Thanks for sharing!
I am Brazilian and always accompany your blog.
I do not speak English very well.
VERY BEAUTIFUL AND EASY!
KISSES
Really cute and simple craft idea to do with the kids! The bubblegum necklace is adorable too!
beautifull!!! TKS