DIY Tutorial: Mod Podge Tile Coasters

Jaime Curtis – one of the talented women behind the ultra-inspiring Prudent Baby – was kind enough to share this fabulous Mod Podge Tile Coasters tutorial with us!
The best thing about this type of project is that you can literally tailor it to any style & color palette you want… there are so many great gift wrap & scrapbook papers out there, so the sky’s the limit! Added bonus: they cost less than $5/set & made for a great gift idea too. Here goes with the DIY details:

DIY Mod Podge Coaster Tutorial
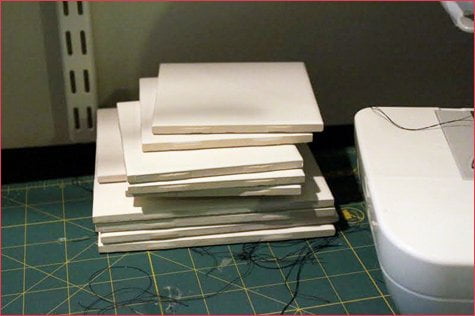
1. Purchase some tiles. I bought six of the cheapest tiles I could find in glossy white; it was under $2.
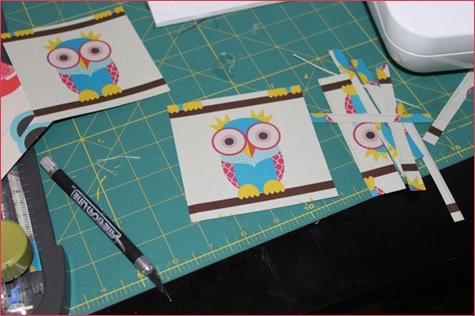
2. Trace your tiles onto your paper. I used these cute matryoshka and owl wrapping papers I found at the art supply store, but you can use any paper other than something printed on your inkjet printer (it will get all smeary):

3. Cut out the squares with an exacto knife – about 1/8″ to 1/4″ smaller then your square on each side – depending on how much tile you’d like to see as a border:
4. Apply a light coat of Mod Podge to each tile with a sponge brush, then center your paper on top. (Work on one tile at a time.) Use your fingers to press the paper nice and flat. Don’t lift it up once you get it on or it will rip and become a big ol’ mess. Let the tiles dry for 20 minutes.

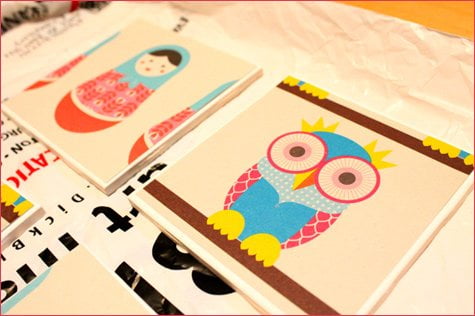
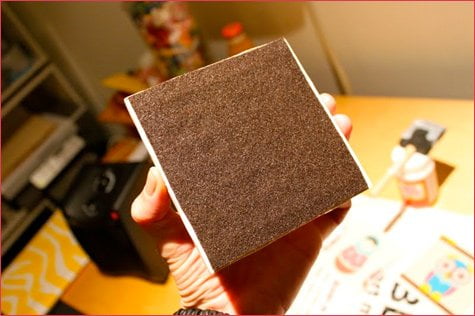
5. While they are drying, cut out six squares of felt for the bottom of your coasters:

6. With your sponge brush, apply another light coat of mod podge to each tile. Let the coat dry for twenty minutes. Repeat this process five or six times.
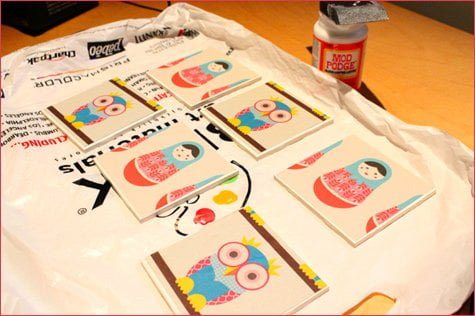
7. When your tiles are dry, turn them over and glue the felt squares to the back. I used rubber cement, but I think tacky glue would work too. You could also use cork or those felt dots that normally go on the bottom of furniture legs.
Note: You can use your coasters the next day but don’t put anything HOT on them for a month – that’s how long it takes the mod podge to fully cure. If you apply a sealant you can use them sooner, as per the directions on the sealant. (I used Polyurethane Spray.)
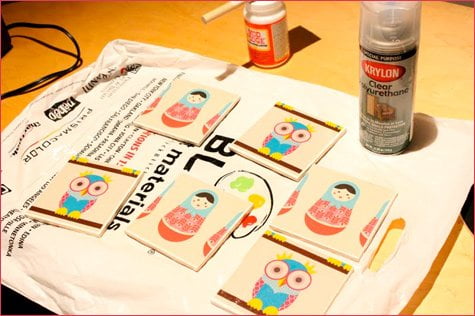
You’re done! Drink up!

*****
P.S. Also – a BIG CONGRATS to Jaime on the upcoming release of her new book – Prudent Advice – which is now available for pre-order at Amazon, Barnes & Noble, and Indie Bound! More info here.
71 Comments
Comments are closed.


I am so impressed with this tutorial! I can’t wait to try it out. They would make fantastic save the dates or wedding favors or just a terrific gift! Thanks!
What a fantastic idea for a personalized gift! I’m bookmarking this one :) Thanks so much for sharing.
wonderful DIY!
just passing by your blog and i have to say its GORGEOUS. do drop by mine too when you have some time. perhaps we can follow each other. =)
Persis.
http://www.onestylemile.blogspot.com
Love the babushka doll!!! what a great idea :)
Great project! You’re right – that would make a great gift! Hostess gift or new home gift. Can be very personalized. Thanks for sharing!
very impressive! very cute designs and perfect for kids party
love it!
Love these! Will definitely be trying. Thanks for sharing :)
what a great treat to be on HWTM today! thank you!
Amazing tutorial, I love using Mod Podge. I’m going to try this!
Thanks for the quick and easy craft idea that’s perfect for home decorating or a great gift idea!
This is a great tutorial! I love this and plan to make a few of these myself.
what a great DIY tutorial! xmas is just around the corner and guess what everyone on my list will be getting?! thanks for sharing!
Great Idea! I LOVE to decoupage!
Wow! So cool! I am not a DIY person so I never thought creating coasters is this easy! Thanks so much!
SUPER cute!
But one question… I thought that Mod-Podge was not water proof? Wouldn’t a sealant of some sort be necessary? Hopefully I’m wrong!
Love this! Also, what fonts did you use above? Thanks!
Love this idea!
I found these exact wrapping papers in a store in TORONTO, CANADA
If you’re interested, I’m not sure of the store name but it is a card and gift shop.
It’s on the North side of Bloor St., East of Bathurst.
They also have lots of other fun and creative things for hosting, baking, creating etc.!
Thanks for the tip, Candace! :)
Hi,
This is such a cute idea! Can’t wait to try it out. We do party favors maybe we can connect check us out at http://www.wrapasweet.com, also http://www.anyatylerfavors.com
Very nice idea.
I used 12×12 tiles and made wall hangings. Then I used plate racks to hang them on the wall. With some scrapbook paper and any other embellishments they make very inexpensive art. I just layerd the different papers with modge podge and then sealed it all.
A great place to get CHEAP tiles is the Habitat Home Store, the shop that is part of the Habitat for Humanity service organization. They sell new and salvaged home items for a great low price, and they always have a ton of tiles of every size. Happy crafting!
Wow! Such a clever idea! Thanks for the great tutorial!
love this!
great choice of paper.
i’m linking. i hope you agree.
thanks for this tutorial.
doro
Wow! Such a wonderful idea! Thanks for the great tutorial :)
I can never find coasters that I love so this is the perfect project and one I can do with my 4 year old. Thanks Jaime!
love this,, granma cookie
Just made these with my 5 year old son for a house warming gift for my SIL.
I used a flowered print paper and it came out beautiful. I bought the tiles from our local craft store for 95 cents a piece. Tomorrow we are going back to the craft store to see if we can find a box to put them in!
Thanks for the great idea!
I made these on a whim for a baby shower gift and put them on my blog back in June. So funny. It was a sailboat theme shower and nursery so I made them as wall hangings.
diydujour.com
I absolutely love these!!!!!
im having a home made xmas this year and didnt have a clue what to make for my dad
these will be perfect with mini and car patterns
:) love it :)
And be sure NOT to stack them up for a while either! Learned that one the hard way. They will stick to each other then you have to pry them apart. Then the top side is fuzzy from the felt of the bottom of the one that was on top of it. Ever tried to shave a coaster? It’s not fun. Other than that, this is a great project. My kids had so much fun with it.
Now I know why I bought that box of tiles for $5 three years ago at the thrift store!
Wonderful job! Thank you for sharing.
I made something similar to this for Christmas gifts in 2009. My Mom had 3 boxes of leftover tiles from her kitchen remodel so I decided to make photo tiles. I lightly sanded the tile, printed pictures I liked of my friends sized to the tile, sprayed a photo protector/sealant on the pictures so the ink wouldn’t bleed then used mod podge to attach the photos to the tile. I used a ruler to get all of the air bubbles out and let them dry over night. The next day I used a resin type sealant, got some ribbon and attached it to the back like an upside down V with Gorilla glue. They’re still hanging on many walls today and they looked great!
This sounds awesome! What kind of sealer did you use? Poly-urethane spray like she suggests? Is that availalbe at craft/hardware stores?
Can you use the tiles that are hole-y?I think this is a great idea and I already have some of those tiles…
Cool!!
This was my first DIY project that I actually remember liking. I was a fence-building-sheep-shearing-hay-bailing girl growing up and hated craftiness. But this last Christmas I made these and learned to love a bottle of mod podge and it’s as important on the grocery list as milk and eggs now!
I’m doing a project for my typography class and this is exactly what I needed. THANK YOU!
can u do these w/ pix do u think? I’m thinking that would be great for a g’parent doing certain years of pix. After the season/holiday is over u can buy printed paper napkins for a .25 a pack sometimes. This would be a great way to always have seasonal coasters. Hope to hear from u about being able to doit w/ actual pix or even art work ur child has done.
I read here not to use something printed out from the printer otherwise the ink will smear. I have read elsewhere that if you spray the printed image with a sealant (poly urethane, acrylic sealer, etc) and let that dry for 24 hours, you can then mod podge your print! I have not tried it yet but I have seen many responses on blogs stating it works, and I will be trying it soon!
Hello. I love this idea and started to try it at home for a party favor and had some problems so I was hoping you could help me. I am printing out Black & White pictures on my home computer using regular computer paper. Then I glue that to the tile and I used an Outdoor Mod Podge (in the green bottle) and it made the image kinda purplish and still bubbly. Could the purple tint be coming from the B&W print or that the Outdoor Mod Podge is white and not clear? Also, how should I make so no bubble form? Which Mod Podge did you use? Will it be water resistant? Thanks in advance for you advice!
Uau , as a great idea, thanks
This is a really neat idea but do you think it would work to use wallpaper scraps?
Haven’t tried it myself so I can’t say definitively, but I would be surprised if it didn’t work with wallpaper scraps :)
Giving credit where credit is due! Posted this on Pinterest with four of mine. Love the project & so do the recipients!
Can you tell what kind of sealant you used for the tiles? I have been having problems with the craft sealants not stopping the mod podge from melting. Any suggestions would be appreciated
I am in the process of making these and seem to be having a hard time. After I sprayed on the sealant I left them alone for a few days before continuing. My issue is this, when I went to stack them to tie a ribbon around for a gift they stuck together and left marks on the ones they were sitting on top of. Anyone else having this problem, and any suggestions??
I want to make these for end of the year teacher gifts, but would like to know the answers to the questions above. #46 and #47 Please email me as soon as possible. Thank you. Sheryl
I am really glad I found this! I did not know about the mod podge having to sit for a month. My roommate and I kept trying to figure out why they wouldnt work with hot stuff and now thanks you you we know
Where can you purchase these tiles?
Any home improvement store. I got mine at Home Depot for 16 cents per tile!
I saw that Lowe's that they have tiles for 10 cents per tile. Shop around.
What kind of tile do you use? I have some ceramic tiles, but I think they're just slightly rough. Do I need glossy, flat tiles?
Making coasters to hekp with wounded warriors program. I am a veteran as well.
I did this with images done on my ink jet printer and had no smearing or running.
I found tiles at our Habitat for Humanity "Renovation Station" got each tile for.13cents each. Am making them for Christmas gifts and using scrap book paper for patterns. can't wait to try it and see how it turns out.
cool
Love your tiles. LOVE your papers too.
Did it with Christmas napkins but be sure to take off extra layers on napkins. Awesome
I have brush strokes is there anyway to avoid this??
Please someone reply to this…..I have brush strokes as well… :(
This was a great idea! Used spare tiles and an old local map, Christmas presents done for three people for the price of Mod Podge!!!
I made these for a x-mas gift with photos and followed the instructions just as they said, used mod Podge brand and after letting them dry for a few days sealed with a spray sealant and let that dry for a few days, but they never seemed to completely dry and made marks on them when I put anything on them. I never did get to send them and am still interested in making them. Can you give me an idea as to why or what I did wrong? Thanks
I love these!!! I’m totally sharing this. I just bought some really cute owl coasters here http://www.galleydirect.com/srchresult.asp?str=coasters. This is such a great way to make them out of a picture that you absolutely love! I could always use more coasters, I’m going to give this a try next.
i purchased 9 glossy white tiles, like the ones a bove, from my local Lowes last night. Total was $1.53.
*.*
impressive tutorial! I can’t wait to try it out. They would make fantastic save the dates or wedding favors or just a beautiful gift!
Thanks!
My pictures keep bubbling when I do the top layer of Mod Podge… What am I doing wrong? I tried both a light and heavy coat underneath and both bubbled. Help!
I used glossy tiles I got at the Habitat for Humanity restore. I got big ones and little inch by inch ones. They charged me under 4.00 for probably 100 tiles between the two… and I'm helping a good cause. They have lots of great stuff. Did this yesterday and had one set get lumpy and another perfect. Used both glossy and matte.