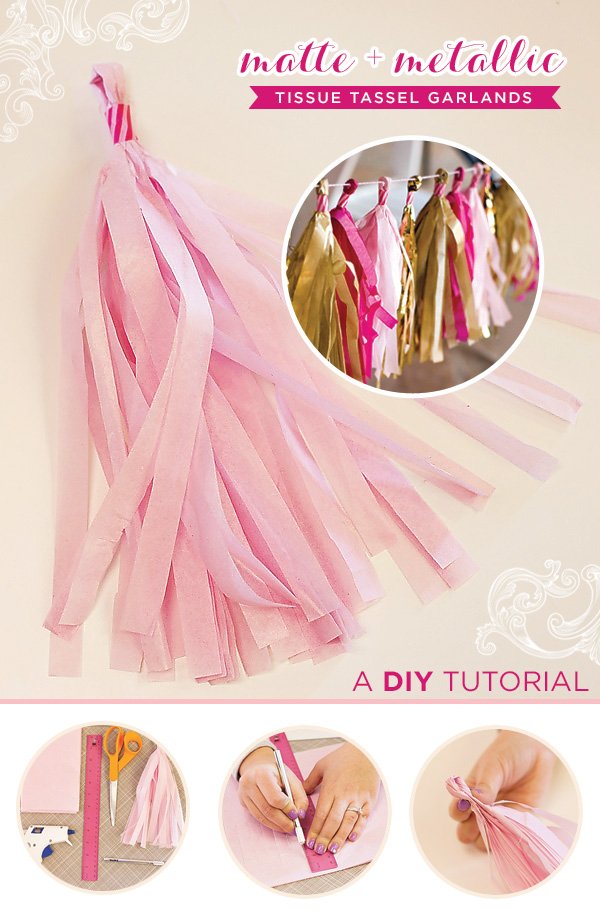
DIY Tutorial: Tissue Tassel Garland {Matte + Metallic}
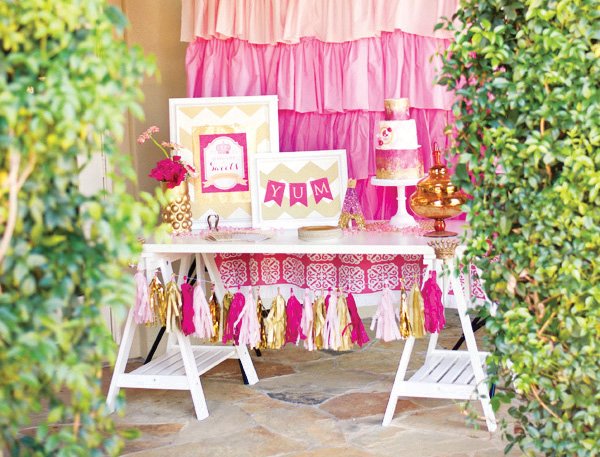
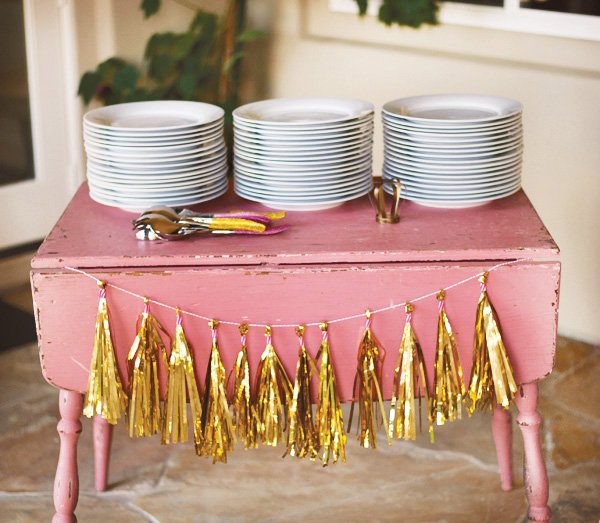
Better late than never, right? Cindy’s glam princess inspired Royal Baby Shower (from earlier this year) featured pink + gold, baby inspiration and crowns! We also added affordable style with crafty (& sparkly!) diy projects like Embellished Doll Furniture and this DIY Tissue Tassel Garland!
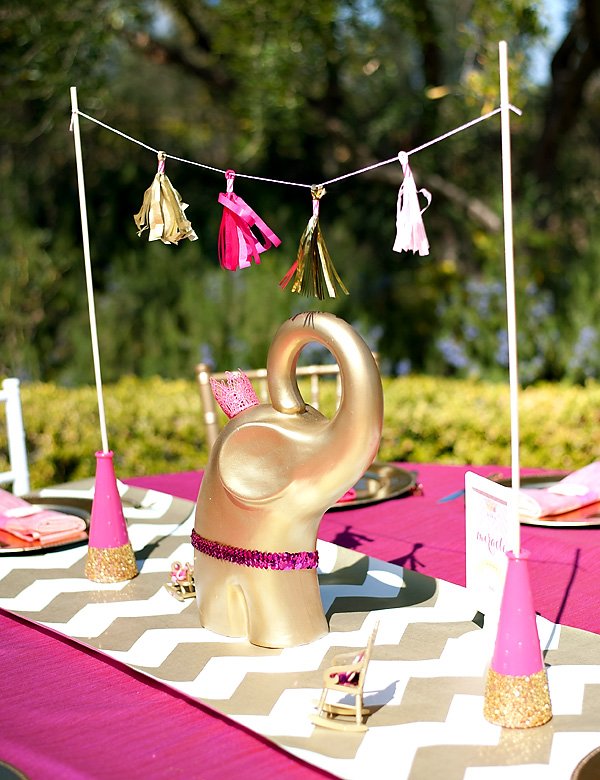
Tassel garlands are such versatile, high-impact party decor. They’re perfect for jazzing up dessert tables, backdrops, and the overall party space – and mini tassels make a whimsical addition to a centerpiece or floral arrangement. Read on for step-by-step info on how to make them yourself!


TISSUE TASSEL GARLAND – A DIY TUTORIAL
Materials:

- Tissue Paper Sheets ((20×20 or 20×24) for matte tassels
- Mylar Sheets OR Foil Fringe Door Curtain for the metallic tassels
- Scissors or X-Acto Knife
- Ruler (optional)
- Hot Glue (optional)
- Scissors
- Washi Tape
- Baker’s Twine
Step by Step instructions:
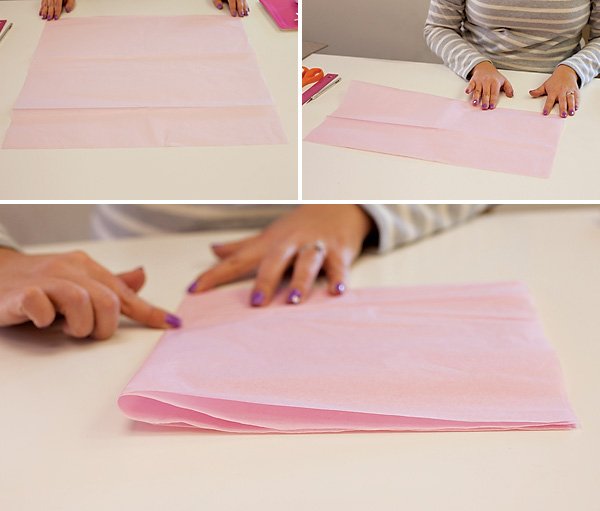

1. Fold your tissue paper sheet in half vertically & horizontally. Cut along one of your folds, creating 2 separate sheets. Stack the two pieces together, one on top of the other.
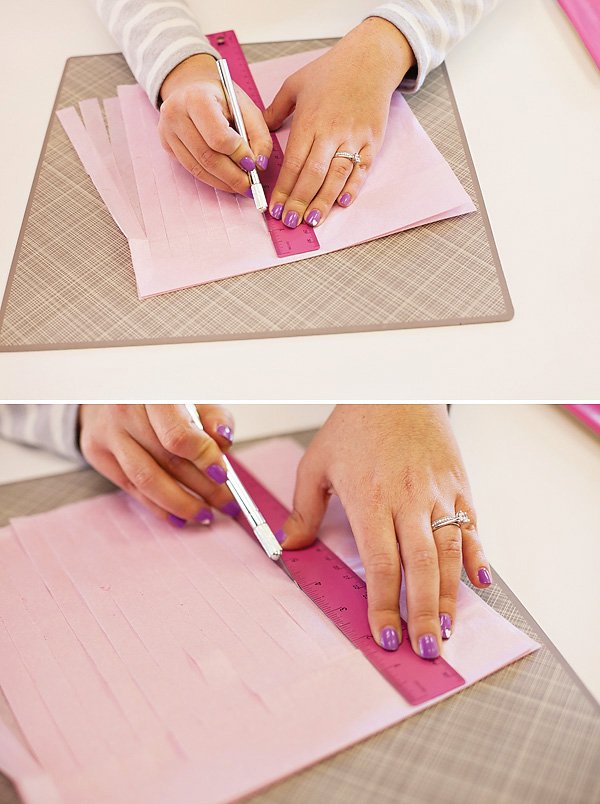
2. Keeping the folds at the top of your sheets, use either your scissors or X-Acto to cut thin vertical strips (about 1/2 inch), leaving about an inch of uncut tissue at the top of your sheet. If you decide to use an X-Acto, you may want to use a ruler to help keep your lines straight.
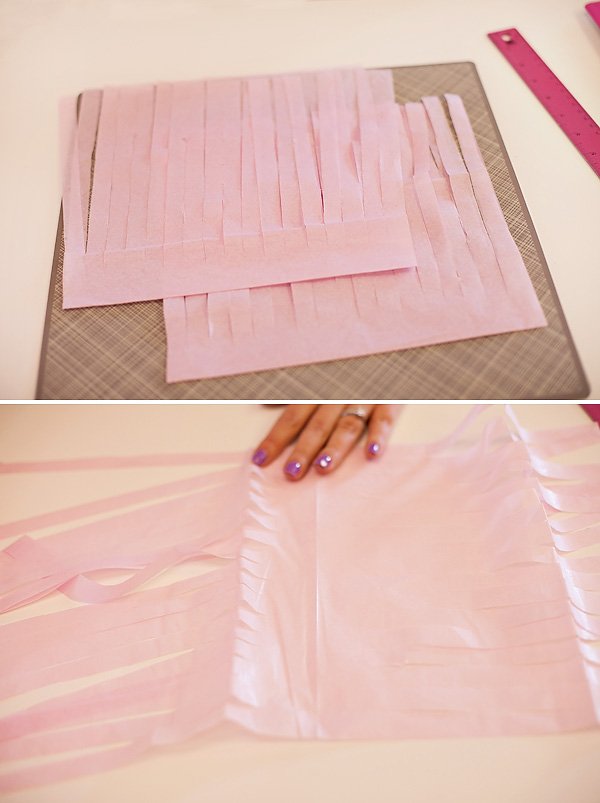
3. Unfold the sheets and flatten out. You should have about 2 inches of uncut tissue paper in the middle of each sheet.

4. Working with one sheet at a time, roll the tissue paper tightly along the uncut middle portion.


5. Twist the rolled piece and fold in half to make a loop. You may twist the bottom of the loop to keep it together, or use a tiny bit of hot glue to make the hold a little stronger.

6. To give the tassel a complete, polished look, use a cute piece of washi tape to cover the base of the loop.

7. Feed the Baker’s Twine through the loops & hang!
TIP: We also made gold tassels using metallic fringe door curtains (available at Party City). Simply cut down to size and fold in half! (You can also use or metallic fringe garlands for smaller tassels.)

MINI TASSELS
To make the mini tassels, cut your sheets into 8×8 or 10×10 before beginning. Your strips should be about 1/4 inch wide.
47 Comments
Comments are closed.


great idea!!!
Thanks for the tutorial, Jenn!
Made these for a cinco de mayo party last year and found the whole process to be a total pain, especially with the mylar. Maybe my scissors need an upgrade. The next time I just ordered from The Flair Exchance on Etsy. I love the addition of the washi tape, though. It looks so cute!
Hi Christina –
You’re right that these are a little consuming! We used pre-cut foil fringe door curtains for the gold mylar tassels though, so those ones were actually the easiest for us! No cutting into strips required. :)
This tutorial shows you how to make a larger version big enough to dress the front of a buffet table or stretch across a wall, but you can easily scale down the project. For a version small enough to add flair to your dining chairs, use 1/8 sheet of tissue paper per tassel.
Where did you buy the pink ombré curtain backdrop?
My friend Paige made it from Paiges of Style. Here’s her website: http://www.paigesofstyle.com/ :)
Thank you!
Great tutorial! I’m curious how you prevented the tassels from sliding around once on the twine?
Hi Trish! A few things:
– We made the twist holes relatively small (although make sure it’s big enough to easily get your twine through).
– We pulled out twine slightly taught- we didn’t leave it so loose that the tassels would sink to the middle.
– And we did let them organically slide around a bit. There was a decent amount of wind at this event and they lasted through it!
Good luck crafting and have fun :)
Where did you find the gold elephant! I’m so in love!
I love the tutorial! It’ll save me for my daughters first birthday party! Also- where did you get that adorable elephant? I’m obsessed!
I really need the gold elephant as certain pieces for up coming party where do you get this?
Hi Deanna –
I actually found various different colors of elephant statuettes from HomeGoods and then spray painted them gold for this party. It’s hit or miss because you never know what styles they’re going to have, but they do always seem to have some sort of elephant designs in stock, and they’re so inexpensive that you don’t feel bad spray painting them ;) Hope that helps!
Great tutorial love your blog!
Check out our blog at Always Me for our DIY holiday tassel garland decor. Perfect for small spaces!
Your instructions were easy to follow. I made a ballon wreath for a friends grandson 1st birthday and I wanted to use the fringe to decorate his highchair without it looking like a tutu, it worked out great. Thanks by again
Thanks, Stacey! So happy to hear that. :)
How did you get the tissue paper to lay flat? Mine has all sorts of creases in it from being folded in the package and the fridge goes every direction!
Hi! Thank you for this tutorial! I used it for decorations for my daughter’s Minnie Mouse birthday party! Everyone was so impressed! If you get a chance, check out how pretty it turned out on my Minnie Mouse Party DIY Post:
Thanks again! :)