DIY Tutorial: Rainbow Butterfly Chocolates
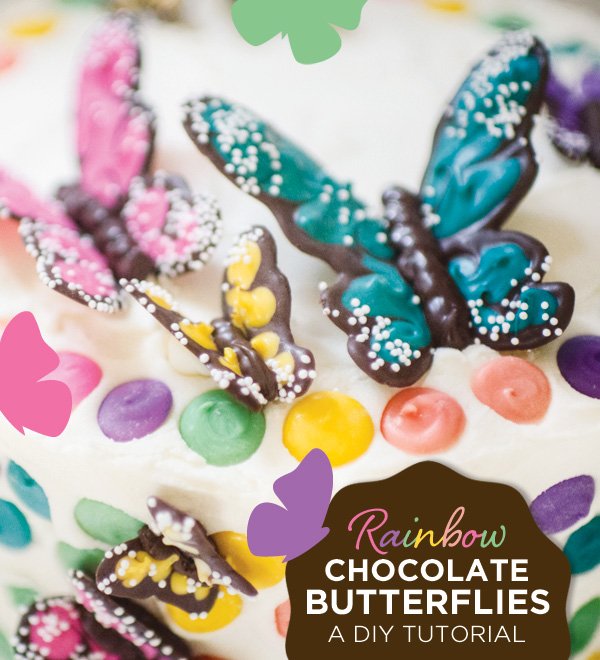
If you loved the Rainbow Butterfly Princess Party by Kelly Allison Photography, then get excited for all the details on that amazing cake! She shares a tutorial for the adorable Rainbow Butterfly Chocolates with a full DIY and tons of helpful tips for working with chocolate! P.S. Great news about this recipe: chocolate stores well at room temperature, so you can make the butterflies in advance and just stick them on before the party!

CHOCOLATE CANDY BUTTERFLIES – A DIY TUTORIAL
Tutorial By: Kelly Allison Photography
Adapted from: Hello Cupcake
Materials:

- Candy making squeeze bottles
- Chocolate candy melts
- Tinted white candy melts
- If you are tinting the candy melts yourself, buy white chocolate candy melts and Oil-based tints
- Parchment paper
- Index card for drawing your butterfly template(s)
- Nonpareils
- Paper straws: fort&field.com
{CAUTIONARY} TIPS FOR WORKING WITH CHOCOLATE:
- Don’t use chocolate chips. they don’t melt as smoothly, and will never fully set. bottom line, they don’t work for this project (trust me, I learned the hard way).
- Don’t let even the tiniest drop of water into your chocolate. Ever. Any moisture will cause the chocolate to sieze. Once that happens, there is no hope. You can use siezed chocolate for baking recipes, but it won’t work for candy (again, speaking from experience).
- If you’re tinting your own white chocolate, use oil tints. As noted above, even the smallest amount of water will ruin your chocolate, so water-based colors won’t work (yes, yes, I tried this, too).
- Don’t overheat your chocolate. Candy melts don’t need much heat to melt to a super smooth consistency, and chocolate that becomes too hot will also become too thick. If you over heat your chocolate and it becomes too thick, don’t add milk, water, butter, shortening, or any other suggestion you might (ahem) find online. Your results will not be candy-friendly. You can, however add paramount crystals which will help to thin your base without ill effects.
- If Bakerella uses Merckens Chocolate, and recommends it, you should follow her advice. I chose a different brand for convenience, and regretted the mistake.
Step by Step instructions:
1. Fill one bottle with chocolate melts, and one with tinted melts. place bottles in a pan of hot water to melt. Take care that no water enters the squeeze bottles- if they come with a cap, use it. After a minute or two in the hot water, shake your bottles to help disperse heat. Repeat as needed until the chocolate is melted to a smooth consistency. Keep the hot water handy as you’ll need to reheat your chocolate as you go.
Alternately, melt your chocolate in a double broiler or in the microwave (taking great care not to overheat) and spoon into sandwich baggies. Cut a small hole at the tip of the bag and use to pipe your design. Once your chocolates are melted, you’re ready to begin.
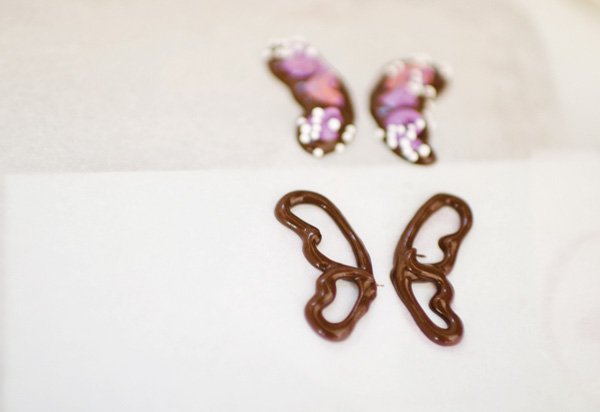
2. Lay a large sheet of parchment over a cookie sheet, and slide your template under at one corner. Using a steady hand, pipe a chocolate border all around each wing. Make sure each wing is an individual candy, so take care they don’t connect at any point.
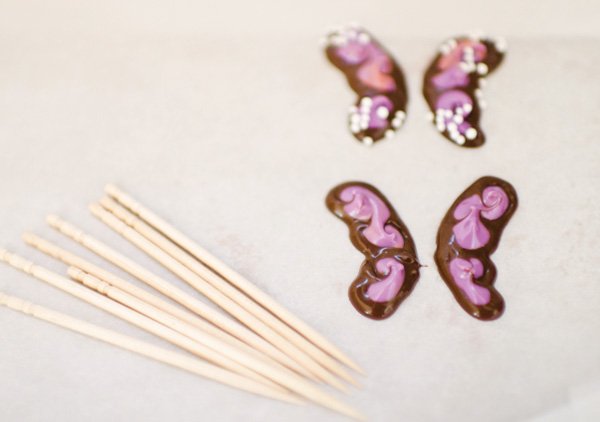
3. Work quick but steady to fill in the wings with your tinted chocolate. Push the tinted chocolate all the way to the chocolate border, with a toothpick, and swirl together in a couple spots, to create a subtle marbling effect.

4. While your chocolate wings are still warm, sprinkle a few nonpareils at the tips of the wings, to mimic the patterning of a monarch. Slide your stencil to a new area of parchment, and repeat.
5. Allow your wings to set on the parchment paper for an hour or so, then move to an air tight container until ready to use.

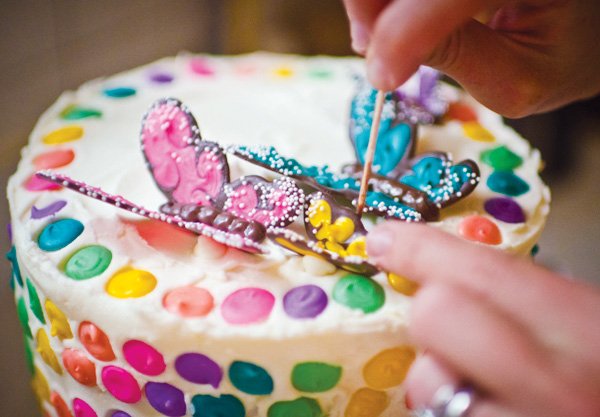
- Cake: To decorate your cake, melt a fresh batch of the dark chocolate melts. Draw a thick line for your butterfly’s body, and allow to cool for a few seconds. While still soft, sink the wings into the chocolate body at your desired angle. Hold in place until set (a few seconds more). For larger wings, add additional support by tucking a white chocolate morsel beneath each wing.
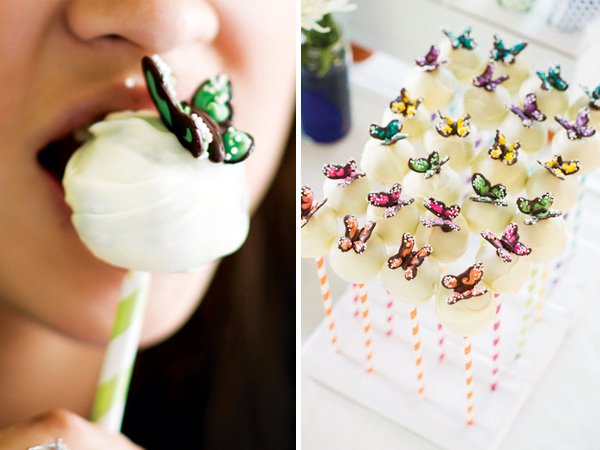
- Cake Pops: I followed the basic recipe and directions found at Bakerella.com When decorating cake pops with butterflies, draw a small body atop each pop, and insert wings as described above. hold in place until set. as the wings are tiny, you shouldn’t need much chocolate to hold them in place. For added cuteness, drop each cake pop into a vintage paper straw.
MORE TIPS:
- For different sized butterflies, simply change the size of your stencil. To mount atop cake pops, I made 1″ wings. For the cake, I used three sizes: 1″, 2″ & 3.1/5″ wings.
- Be sure not to freeze your chocolate pieces. Extreme temps cause the fats in chocolate to bloom, bringing chalky looking crystals to the surface. Room temperature storage is always best.
- If you have chocolate left over once you’ve made your desired quantity, play around on the parchment to create additional design elements for decorating. With the extra tinted chocolate I had from the project, I created rows of polka dots that were later used to decorate the sides of the cake.

*****
11 Comments
Comments are closed.


Wow, these are absolutely beautiful I wish I had seen these before my daughter’s butterfly party last year! Still….I may just give them a go just because!
This idea is so clever and cute!!!! Thanks for the tutorial!
Thanks so much for the feature! It’s such fun to be a part of the incredible parties you post.
WOW! How original! I love them… this would be awesome for a spring time wedding, if they were all uniform in the wedding colors.
Love this! Can you supply the butterfly template you used for these?
Stephanie–I just drew my butterflies by hand. If you’re not comfortable with creating your own, I’m sure you could find good butterfly shapes on google images.
This is a great idea but for the measurement of the butterfly wings did you measure height or width